

User Edit
Set user passwords, associate users with providers and employees, and set additional options from the User Edit window.
In the Security window, click Add User.
Alternatively,
- In the Main Menu, click Setup, Security Add User.
- In the Security window, double-click an existing user from the grid to edit.
To add a User:
- The User must have the "Security Admin" Permission or Add User Permission.
- A default user group must be set in Global Security Settings.
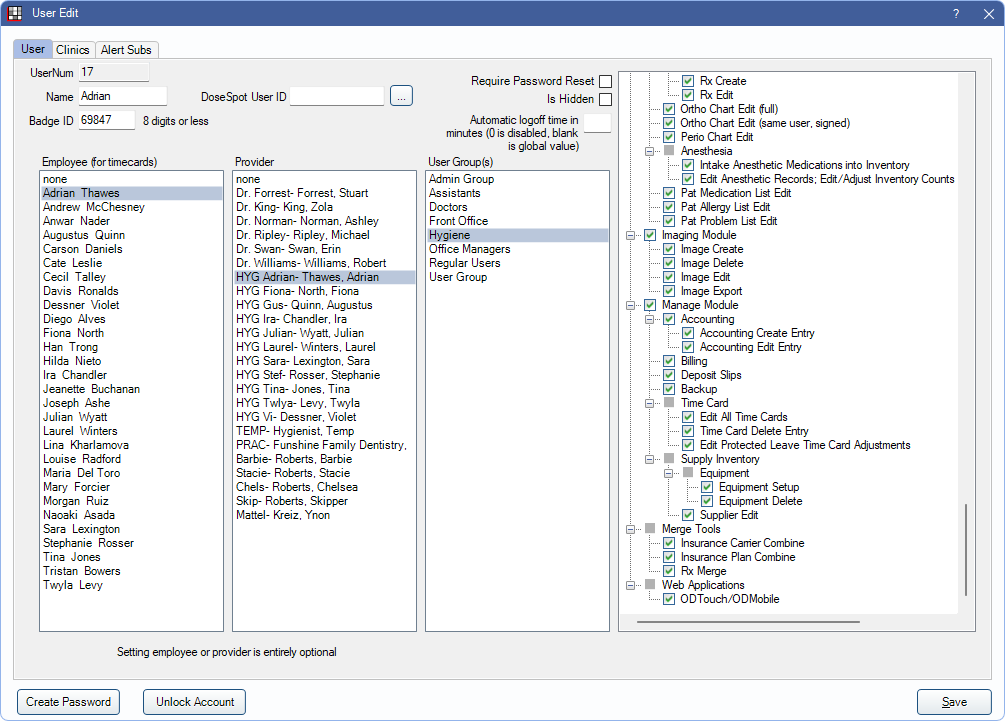
User Tab
Use the User tab to set up or edit a User for an employee.
- UserNum: This is an internal unique identifier that is useful for third party reporting.
- Domain User: Only visible if Single Sign-On / Domain Login is turned on. Click [...] and select the domain user.
- Name: Enter the employee's username for logging on to Open Dental.
- Badge ID: Enter the ID for an employee's physical badge. Supports a badge ID of exactly eight digits. Allows users to log on to Open Dental using a badge scanner. See Security Badges for additional information.
- DoseSpot User ID: If this is a user using DoseSpot eRx, enter the User ID assigned by DoseSpot. For users with multiple DoseSpot User ID numbers, click [...] to add the corresponding DoseSpot User ID for each clinic. See DoseSpot Setup.
- Require Password Reset: Check to prompt the user to reset their password upon logging in.
- Is Hidden: Check to hide this user from the Log On window. Useful when an employee leaves the office. Users cannot be deleted.
- Automatic logoff time in minutes (0 is disabled, blank is global value): Set a time when, after a certain period of inactivity, for Open Dental to automatically log off the user. Allow user override for automatic log off must be checked in Global Security Settings.
- Employee (for timecards): Select the Employee associated with the user. Required for offices using Time Clock.
- Provider: Select the Provider associated with the user.
- User Group: Select the User Group(s) the user should be assigned to. Users can be assigned to more than one group. User groups control which permissions a user has. Users assigned to multiple groups have all of the permissions given to each group.
- Permissions: Users allowed permissions display on the right. Permissions must be edited from the User Groups tab in the Security window.
Clinics Tab
Only visible if using Clinics.
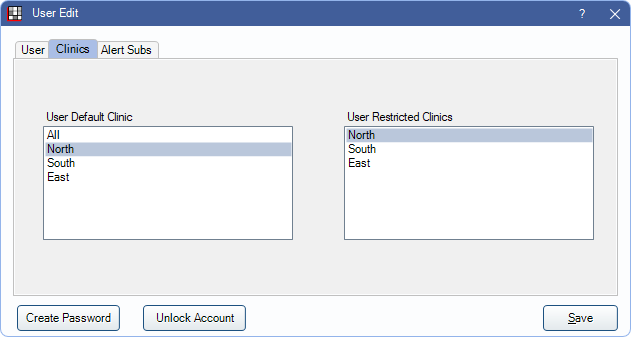
- User Default Clinic: Select the user's default clinic. Only one option can be selected. If All is selected, Headquarters is the default. Usually, this clinic is selected automatically when the user logs on.
- User Restricted Clinics: Restrict a user to one or more clinics (optional). See below for a list of items that are affected by clinic restrictions. Clinic restrictions apply to Open Dental and ODTouch.
When a user is restricted to specific clinics, they face limitations in the following areas:
- Only clinics the user has access to are listed in the Main Menu, Clinics.
- Only patients in clinics the user has access to show when selecting patients.
- Patients are associated to clinics when the clinic is their default or if they have any appointments in the clinic.
- Users can be granted the Unrestricted Search permission to access all clinics when selecting patients.
- User can only see alerts for clinics they have access to (when the clinic is selected in the Main Menu).
- Billing
- Recurring Charges
- Charges
- Reports
- Sending Claims
- Time Card Management (if also have the time card manage permission)
- Time Clock (only show employees for their allowed clinic)
- Scheduling
- Fee Schedules
When providers are restricted to clinics, it may affect the available provider options in some areas (e.g., the only providers showing in lists are those who have access to a clinic). These areas include:
- Operatory Setup
- Edit Appointment window
- Edit Patient Information
- Adjustments
- Edit Claim Window
- Payment Plan
- Pay Splits
- Broken Appointment Procedure window
- Edit Procedure window
- Schedule Setup
Alert Subs Tab
Subscribe the user to specific alerts. See Alert Subscription. Alerts show in the Main Menu to notify the user about important information.

- User Alert Subscriptions: Select one or more alert types for this user to receive.
- Clinics Subscribed: Select one or more clinics for which the user should receive alerts.
Password Options and Save
Create Password / Change Password: Label changes depending on if the user already has a password. Click to create a new Password used when logging on to Open Dental. 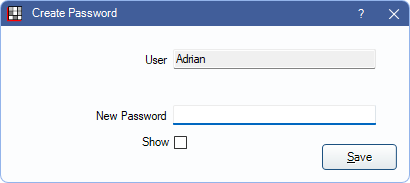
- New Password: Enter the password to use for the account.
- Show: By default, text entered in New Password is masked. Check this box to view the password.
- Click Save create the new password.
Unlock Account: Click to allow a locked-out user to attempt logging in to Open Dental again immediately.
- Accounts are temporarily locked for five minutes after more than five consecutive failed attempts to log on to Open Dental or ODMobile. This button only shows when editing an existing user.
- If the user does not remeber their password, use the Change Password option to reset the password before another log-in attempt.
Click Save to close the window and keep any changes to the user, including password changes.