

Deposit Slip
Deposits slips can be created for patient payments and insurance payments.
In the Manage Module, click Deposits.
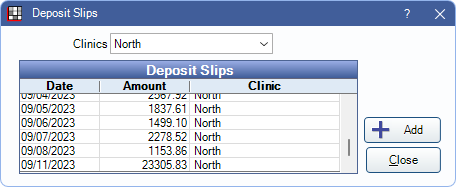
A dated list of all deposits ever made is shown. Use the Clinic dropdown menu to filter the list by Clinics.
For each deposit, a Deposit Slip can be printed with bank account information. See Deposit Slip Layout to customize. Set up Automatic Deposit Entries in the Accounting system to track bank account deposits (see Accounting Setup). Deposits can also be created for QuickBooks and QuickBooks Online.
- The internal (default) Deposit Slip is designed to print onto preprinted QuickBooks forms and can only include 18 payments per slip. The top third is included with the bank deposit and preprints bank account information. The bottom 2/3 is a detailed report that is kept for records.
- The first Deposit Slip in the Sheets Custom list is used for printing. If no custom Deposit Slip exists, the Internal Deposit Slip is used.
- To automatically create deposits when finalizing insurance payments, enable Insurance payments show auto deposit in Preferences.
Edit Deposit Slip
Click Add to create a new deposit or double-click an existing deposit to edit. The Edit Deposit Slip window opens.
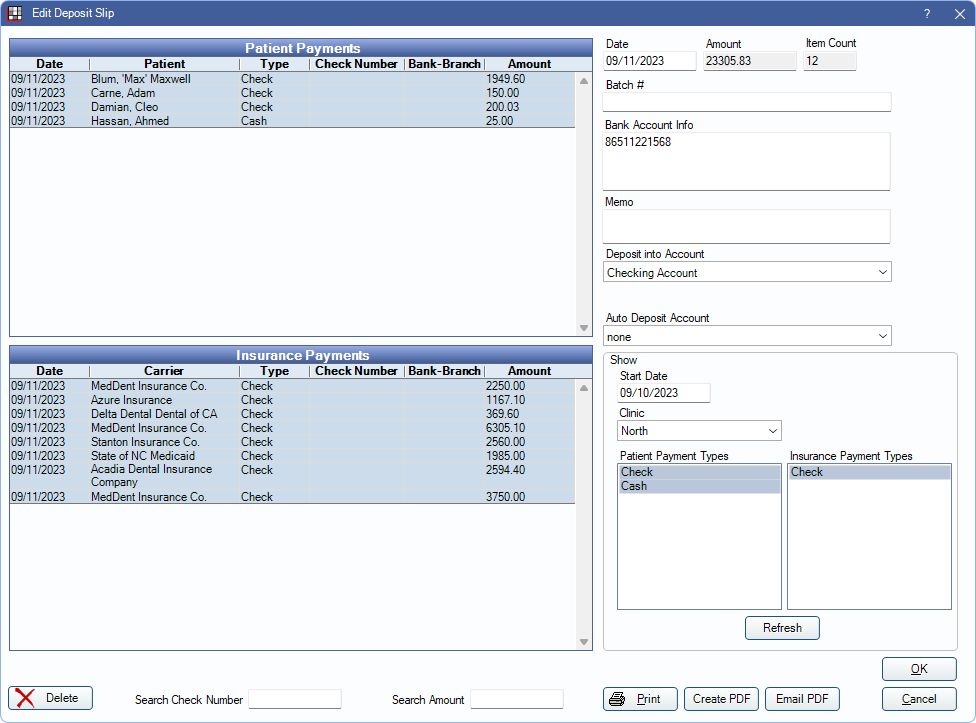
By default, all payments are highlighted when creating a new deposit. Deselect payments to exclude them from this deposit or change filter criteria in the Show area (only displays when a new deposit is added).
Patient Payments: When creating a new deposit, this is a list of Payments that are not attached to a deposit (sorted by payment date, then date entered), meeting Show criteria. When editing an existing deposit this is the list of patient payments attached to the deposit.
Insurance Payments: When creating a new deposit, this is a list of Claim Payments that are not attached to a deposit (sorted by payment date, then date entered), meeting Show criteria. When editing an existing deposit this is the list of insurance payments attached to the deposit.
Deposit Information:
- Date: Today's date by default.
- Amount: Auto-calculated based on selected payments.
- Item Count: Read-only. Total number of deposit line items selected.
- Batch #: Enter the Batch Number for the selected group of payments. Usually used for credit card payments.
- Bank Account Info: By default is the bank account information as entered on the Edit Practice Info window (see Practice Setup) or Edit Clinic window for clinics (see Clinic List).
- Memo: Enter any notes specific to this deposit.
- Deposit into Account: This option only shows if Accounting is set up. Click the dropdown to select an account to deposit into. Only displays on new deposits.
- Auto Deposit Account: Auto deposit account attached to deposit. See Definitions: Auto Deposit Account.
Show: Filter the payments displayed in the Patient Payments and Insurance Payments grids. This area only displays when creating a new deposit.
- Start Date: Enter a date to only see payments made on or after this date this date. Clicking Refresh after changing the Start Date sets this date as the default Start Date for the next deposit.
- Clinic: Filter the list to only include payments made to a specific clinic. The default clinic is the clinic selected in the Main Menu.
- Patient Payment Types: Highlight the Patient Payment Types to include. Payment Types marked N in Definitions: Payment Types are not listed.
- Insurance Payment Types: Highlight the Insurance Payment Types to include. Payment Types will marked N in Definitions: Insurance Payment Types are not listed.
Click Refresh to update payments shown in the grids.
Delete: Remove the deposit slip and detach payments from deposit. This does not delete any payments.
Search Check Number: Enter a Check Number to find a payment in the deposit.
Search Amount: Enter a payment amount to find a payment amount in the deposit.
Print: Print deposit slips directly without generating a preview (does not save).
Create PDF: Generate a PDF of the deposit slip (does not save).
Email PDF: Opens the Edit Email Message window (see Email Message Edit) and automatically attaches a PDF of the deposit slip (does not save).
QuickBooks
To send deposits to QuickBooks:
- Create the deposit.
- Click Send QB.
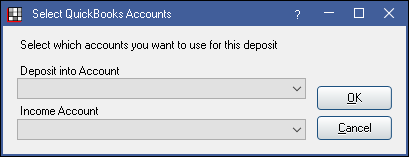
- Select the desired deposit and income account for this deposit.
Users have the option of sending deposits to Class Refs in QuickBooks for clinics. To enable this option and define Class Ref options, see QuickBooks, Enable QuickBooks Class Refs. When enabled, there is a Class dropdown on the Edit Deposit Slip window:
To send deposits to a specific Class Ref in QuickBooks:
- Create the deposit.
- Select the clinic.
- Click the Class dropdown to select the Class Ref. The available options are determined by the Class Refs added on the Setup Accounting window.
- Click OK or Send QB.
- Select the desired deposit and income account for this deposit.
A message advises the deposit was successfully sent to QuickBooks.
QuickBooks Online
When QuickBooks Online is enabled, users are prompted to select the account. Select the accounts from the dropdown, then click OK.
Correct a Deposit
To correct a deposit follow these steps:
- Gather all physical documentation regarding the deposit.
- Print the current deposit slip in Open Dental for records.
- Open the deposit, then click Delete to delete it. If using the Accounting feature, deleting the deposit also removes the transaction from the Transaction History. Note: If needing to change or delete a deposit, the same change must manually be made in QuickBooks.
- Manually go through and correct the claim payments, check amounts, or anything that was causing the deposit to be incorrect.
- Create a new deposit (see steps 1 - 5 above).
Hint: It is easiest to complete all deposits first, then make corrections at the end. This way all remaining payments can easily be identified as the payments to attach to the corrected deposit.