

Sheet Checkbox and Radio Button
Add Checkboxes to sheets to allow for easy data entry on Medical History Forms, Exam Sheets, and more.
In Edit Sheet Def, click Check Box.
Alternatively, double-click an existing Check Box field from the Fields list to edit.
Checkboxes and radio buttons are Sheet Field Types used to indicate a selection by toggling an X on or off. The look of this window and the available fields change depending on sheet type and selected Field Name.
- Checkboxes allow one or many selections.
- Radio buttons allow only one selection out of a group of options.
- Both can correspond to a specific field in the database, though misc fields do not have a database value.
The checkbox or radio button is the actual X, not a box surrounding the X. This makes it useful for scanned backgrounds. To add a box around the checkbox or radio button, add a Rectangle as a visual indicator.
- Suggested size for the checkbox is 11x11 through 13x13. The surrounding rectangle is typically 1 pixel larger and the checkbox should be inset by 1 pixel. For example:
- Rectangle: x=0, y=0, w=13, h=13
- Checkbox: x=1, y=1, w=12, h=12
- Checkboxes and radio buttons for medical histories require additional setup. See Medical History Layout.
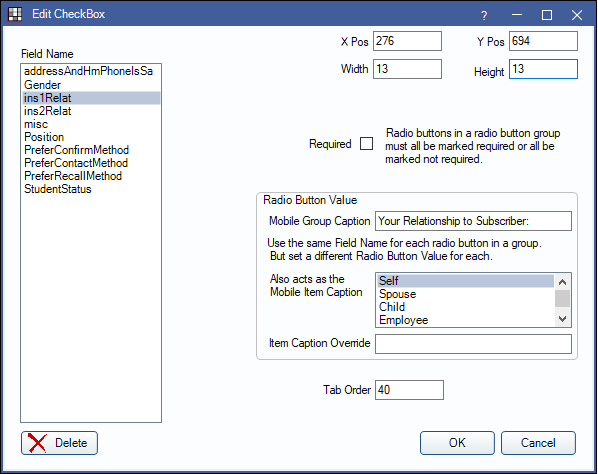
Position and Size
Displays for all sheet and checkbox types.
X Pos / Y Pos: The X and Y position of the checkbox on the sheet.
Width / Height: The width and height of the X for the checkbox.
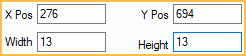
Field Name
Dislays for all sheet and checkbox types.
Field Name: The available field options the checkbox can correspond to. The selected field may change other options on the screen.
- Fields (other than misc) can be imported.
- Misc can be used to collect data that does not correspond to a database field. The entered data cannot be imported, but can be reported in a custom Query. Entered data is stored in the sheetfield.fieldvalue column in the sheetfield table.
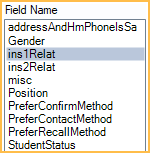
Add Procedure: Only displays on Screening sheets. Allows a user to assign a procedure code to a checkbox. When checked, the procedure code will automatically chart.
Allergies
Only displays when allergy is the selected Field Name on Medical History sheets.
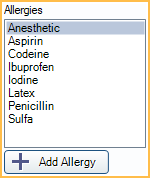
Add Allergy: Click to add a new allergy to the Allergy Master List.
Problems
Only displays when problem is the selected Field Name on Medical History sheets.
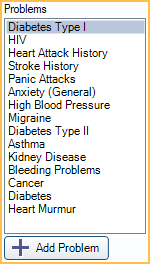
Add Problem: Add a new problem to the Problem Master List.
Radio Button
Only displays when misc is the selected Field Name.
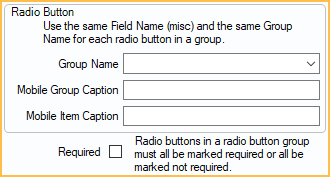
Group Name: Used to create custom checkboxes or radio buttons not tied to a database field.
- For radio buttons (single selection), enter a common name used for all radio buttons in the group.
- For checkboxes (one or many selections), enter a unique group name for the checkbox.
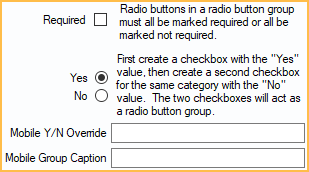
- When using Yes/No checkboxes, the user can choose to omit the No boxes. The Yes boxes will act as Yes when checked, and No when unchecked.
Mobile Group Caption: The caption that displays on mobile sheets for the group.
Mobile Item Caption: The caption that displays on mobile sheets for the specific checkbox.
Required: If checked, the user will be required to select an option in the generated form before saving it. If adding radio buttons, all radio buttons in a group should be marked the same: all required or all not required.
Radio Button Value
Only displays when a database field is the selected Field Name. The values listed are based on database options. Create one radio button for each value.
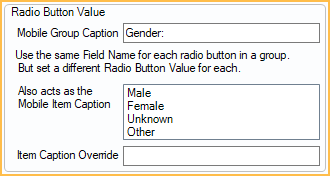
Mobile Group Caption: The caption that displays on mobile sheets.
Mobile Item Caption: The caption that displays on mobile sheets for the specific checkbox
Item Caption Override: Enter an override for Mobile Item Caption. This caption displays on mobile sheets instead of the value selected above.
Yes / No Checkboxes
Only displays when allergies or problems are selected on Medical History sheets.
Yes / No: Create a value for yes, and a value for no. (e.g., Yes the patient has this allergy, No this patient does not have this allergy)
Mobile Y/N Override: Allows the user to change the value from "yes" or "no" to a custom value.
Mobile Group Caption: The caption that displays on mobile sheets.
Reportable Name
Displays when misc is the selected Field Name.
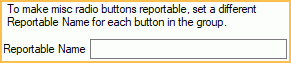
Reportable Name: Enter an identifying name for this misc checkbox/radio button.
Tab Order
Displays for all checkbox types.
Tab Order: The order of an element when users press Tab on the generated form. (Hint: Click Tab Order in the right panel to view and edit the tab order of all elements on a sheet.
Creating Radio Buttons for Database Fields
These steps will create a group of radio buttons that correspond to database fields and whose values can be imported. Users must create a radio button for each possible value in a radio button group for it to work correctly. If a user clicks one radio button in a group, the other buttons in the group automatically uncheck.
- On the Edit Checkbox window, select the Field Name (other than misc).
- Enter the Mobile Group Caption (the shared caption for all of the buttons).
- Select the first radio button value.
- (Optional) Enter an Item Caption Override for the button.
- Click OK.
- Move the radio button to the correct location.
- Click Check Box again.
- Select the same Field Name.
- Select the next radio button value. (the Mobile Group Caption will automatically carry over from the previous button.)
- Click OK.
- Move the radio button to the correct location.
- Repeat step 6 - 10 until all radio button values have an associated radio button.
Creating Misc Radio Buttons
These steps will create a group of radio buttons whose values cannot be imported, but can be reported in Custom Queries.
- On the Edit Checkbox window, select misc as the Field Name.
- For Group Name, enter a common name that will be used for all radio buttons in this group (e.g., Family Heart History).
- For Mobile Group Caption, enter a common name that will be used for all radio buttons in this group. This is what will display in mobile layout and can be the same as the Group Name.
- For Mobile Item Caption, enter the name of the this button that will display in mobile layout.
- If the office wants to run a custom query (optional): For Reportable Name, enter a unique name for this option (e.g., Paternal Only, Maternal Only, Both, None). This is the name that will be reportable in a query when this radio button is selected.
- Click OK.
- Move the radio button to the correct location (e.g., click and drag).
- Click Check Box again.
- Select misc again.
- Enter the same Group Name.
- Enter the same Mobile Group Caption.
- Enter a unique Mobile Item Caption for this button.
- Enter another unique Reportable Name.
- Click OK.
- Move the radio button to the correct location.
- Repeat step 8 - 15 for all radio buttons in the group.
Create a Misc CheckBox
These steps will create a checkbox that allow one or many selections. Repeat these steps for each checkbox.
- On the Edit Checkbox window, select misc as the Field Name.
- For Group Name, enter a unique group name for this button (e.g., Paternal, Maternal).
- For Mobile Group Caption, enter a common name or question that will be used for all buttons in this group.
- For Mobile Item Caption, enter a unique name for this button.
- For Reportable Name, enter a unique identifying name for this option.
- Click OK.
- Move the checkbox to the correct location on the sheet.