

Messaging Buttons
Messaging buttons appear in a left vertical toolbar below the module buttons.
Messaging Buttons work with messaging elements to communicate with other computers in the office using light, sound, and/or text. They are a shortcut that is the equivalent of clicking a sequence of messaging elements in the Manage Module.
Clicking a button can cause it to light up, cause other buttons to light up, or can trigger no light at all. Click a lit message button to acknowledge.
![]() See our video: Messaging and Messaging Buttons.
See our video: Messaging and Messaging Buttons.
To customize message buttons, you must complete two steps:
- Set up Message Element (select colors, rows).
- Set up Messaging Buttons (button text, position, assign messaging elements). See below.
Set up Messaging Buttons
In the Main Menu, click Setup, Manage, Messaging Buttons.
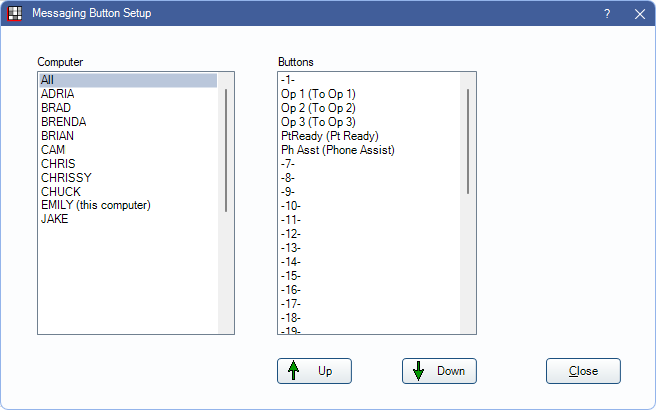
All computers in the office list on the left. The computer that you are currently on is indicated by (this computer).
All buttons currently set up for the selected workstation show on the right, listed in row order. If -1-, -2-, etc. shows, the button is blank on this workstation. Up to 40 buttons can be added. Click the up/down arrows to reorder buttons.
- Select the computer(s) this button will be set up on (an individual computer or All).
- Highlight All to show the button on all computers (e.g., Op 1, Op 2, Op 3, Pt Ready, Ph Asst).
- Highlight a computer to only display the button on that computer. To show the button on multiple computers, but not all, the button must be set up separately for each computer.
- Double-click a button in the Buttons area.
- Enter button criteria, then click OK.
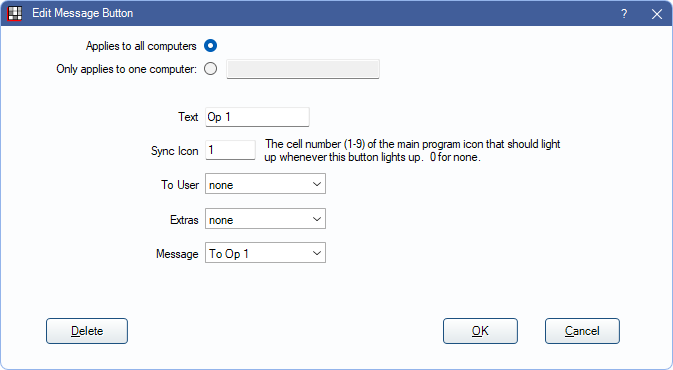
- Applies to all computers vs Only applies to one computer is set on the previous screen.
- Text: The exact label that will appear on the button. Text wraps when it reaches the end of the line.
- Sync Icon (optional): Enter a cell number (1-9) that lights up when the corresponding messaging button is clicked. 1-9 refers to one of the cells in Open Dental's program icon.
 The cells are numbered 1-9, left to right, starting with the top row and working down.
 - To User, Extras, Message: Select the messaging elements that will determine the behavior of this button. Light color, sound, and light row is determined by each element.
Hints
Hints: To quickly change the default messaging button setup for your office, here are a few guidelines.
- The first and second row are initially blank on all workstations. On each operatory workstation, set up a this computer setting that calls a user (e.g. Doctor, Assistant) to that operatory (e.g. To Op 1).
- If you have more than three operatories, create more location messaging buttons (e.g. Op 4, 5, 6, etc.). You will need to create new message elements for each (To Op 4, To Op 5) and in each element set the correct light row. Move the PtReady and Ph Asst buttons down a few rows to accommodate the new buttons.
- If you have more than three users that you want to call using a button, create more user message buttons (DrA, DrB, Hygienist) that call each user to each operatory (To Op 2, To Op 3). In each user message element, select a unique light color and sound. Move the Op, PtReady, and Ph Asst buttons down to accommodate the new buttons.
Button colors use the following priority:
- Message
- Extras
- Users
Specific buttons can be set up on specific computers. However, if on computer A you set up an Op1 button in row 5, and for all computers you set up an Op 2 button in row 5, computer A will never see the Op 2 button setup for all computers.
For buttons to work correctly, the light row in a messaging element and the button location (row) in Messaging Button Setup must match.
Troubleshooting
If the Sync Icon doesn't work, it may be due to your operating system. In Windows 7, 8 and 10 you may be able to correct this by right clicking on the taskbar and selecting properties (or taskbar settings). Look for the Always Combine option and change it to Never Combine or Combine When Taskbar Is Full.