

Denti-Cal
See Clearinghouses.
Offices may submit claims directly to Denti-Cal using the process outlined below.
- Denti-Cal website: www.denti-cal.ca.gov.
- EDI Support Phone: (916) 853-7373. Ask for Denti-Cal EDI Support when you've reached an operator.
- EDI Support Email: denti-caledi@delta.org
Submitting Through a Clearinghouse
Most Denti-Cal users submit claims to a clearinghouse, which then submits to Denti-Cal. When this is done, the steps below are not needed.
Contact your Clearinghouse for details.
Submitting Directly to Denti-Cal
To submit claims directly to Denti-Cal, you can print a paper Claim Form, or submit electronic claims.
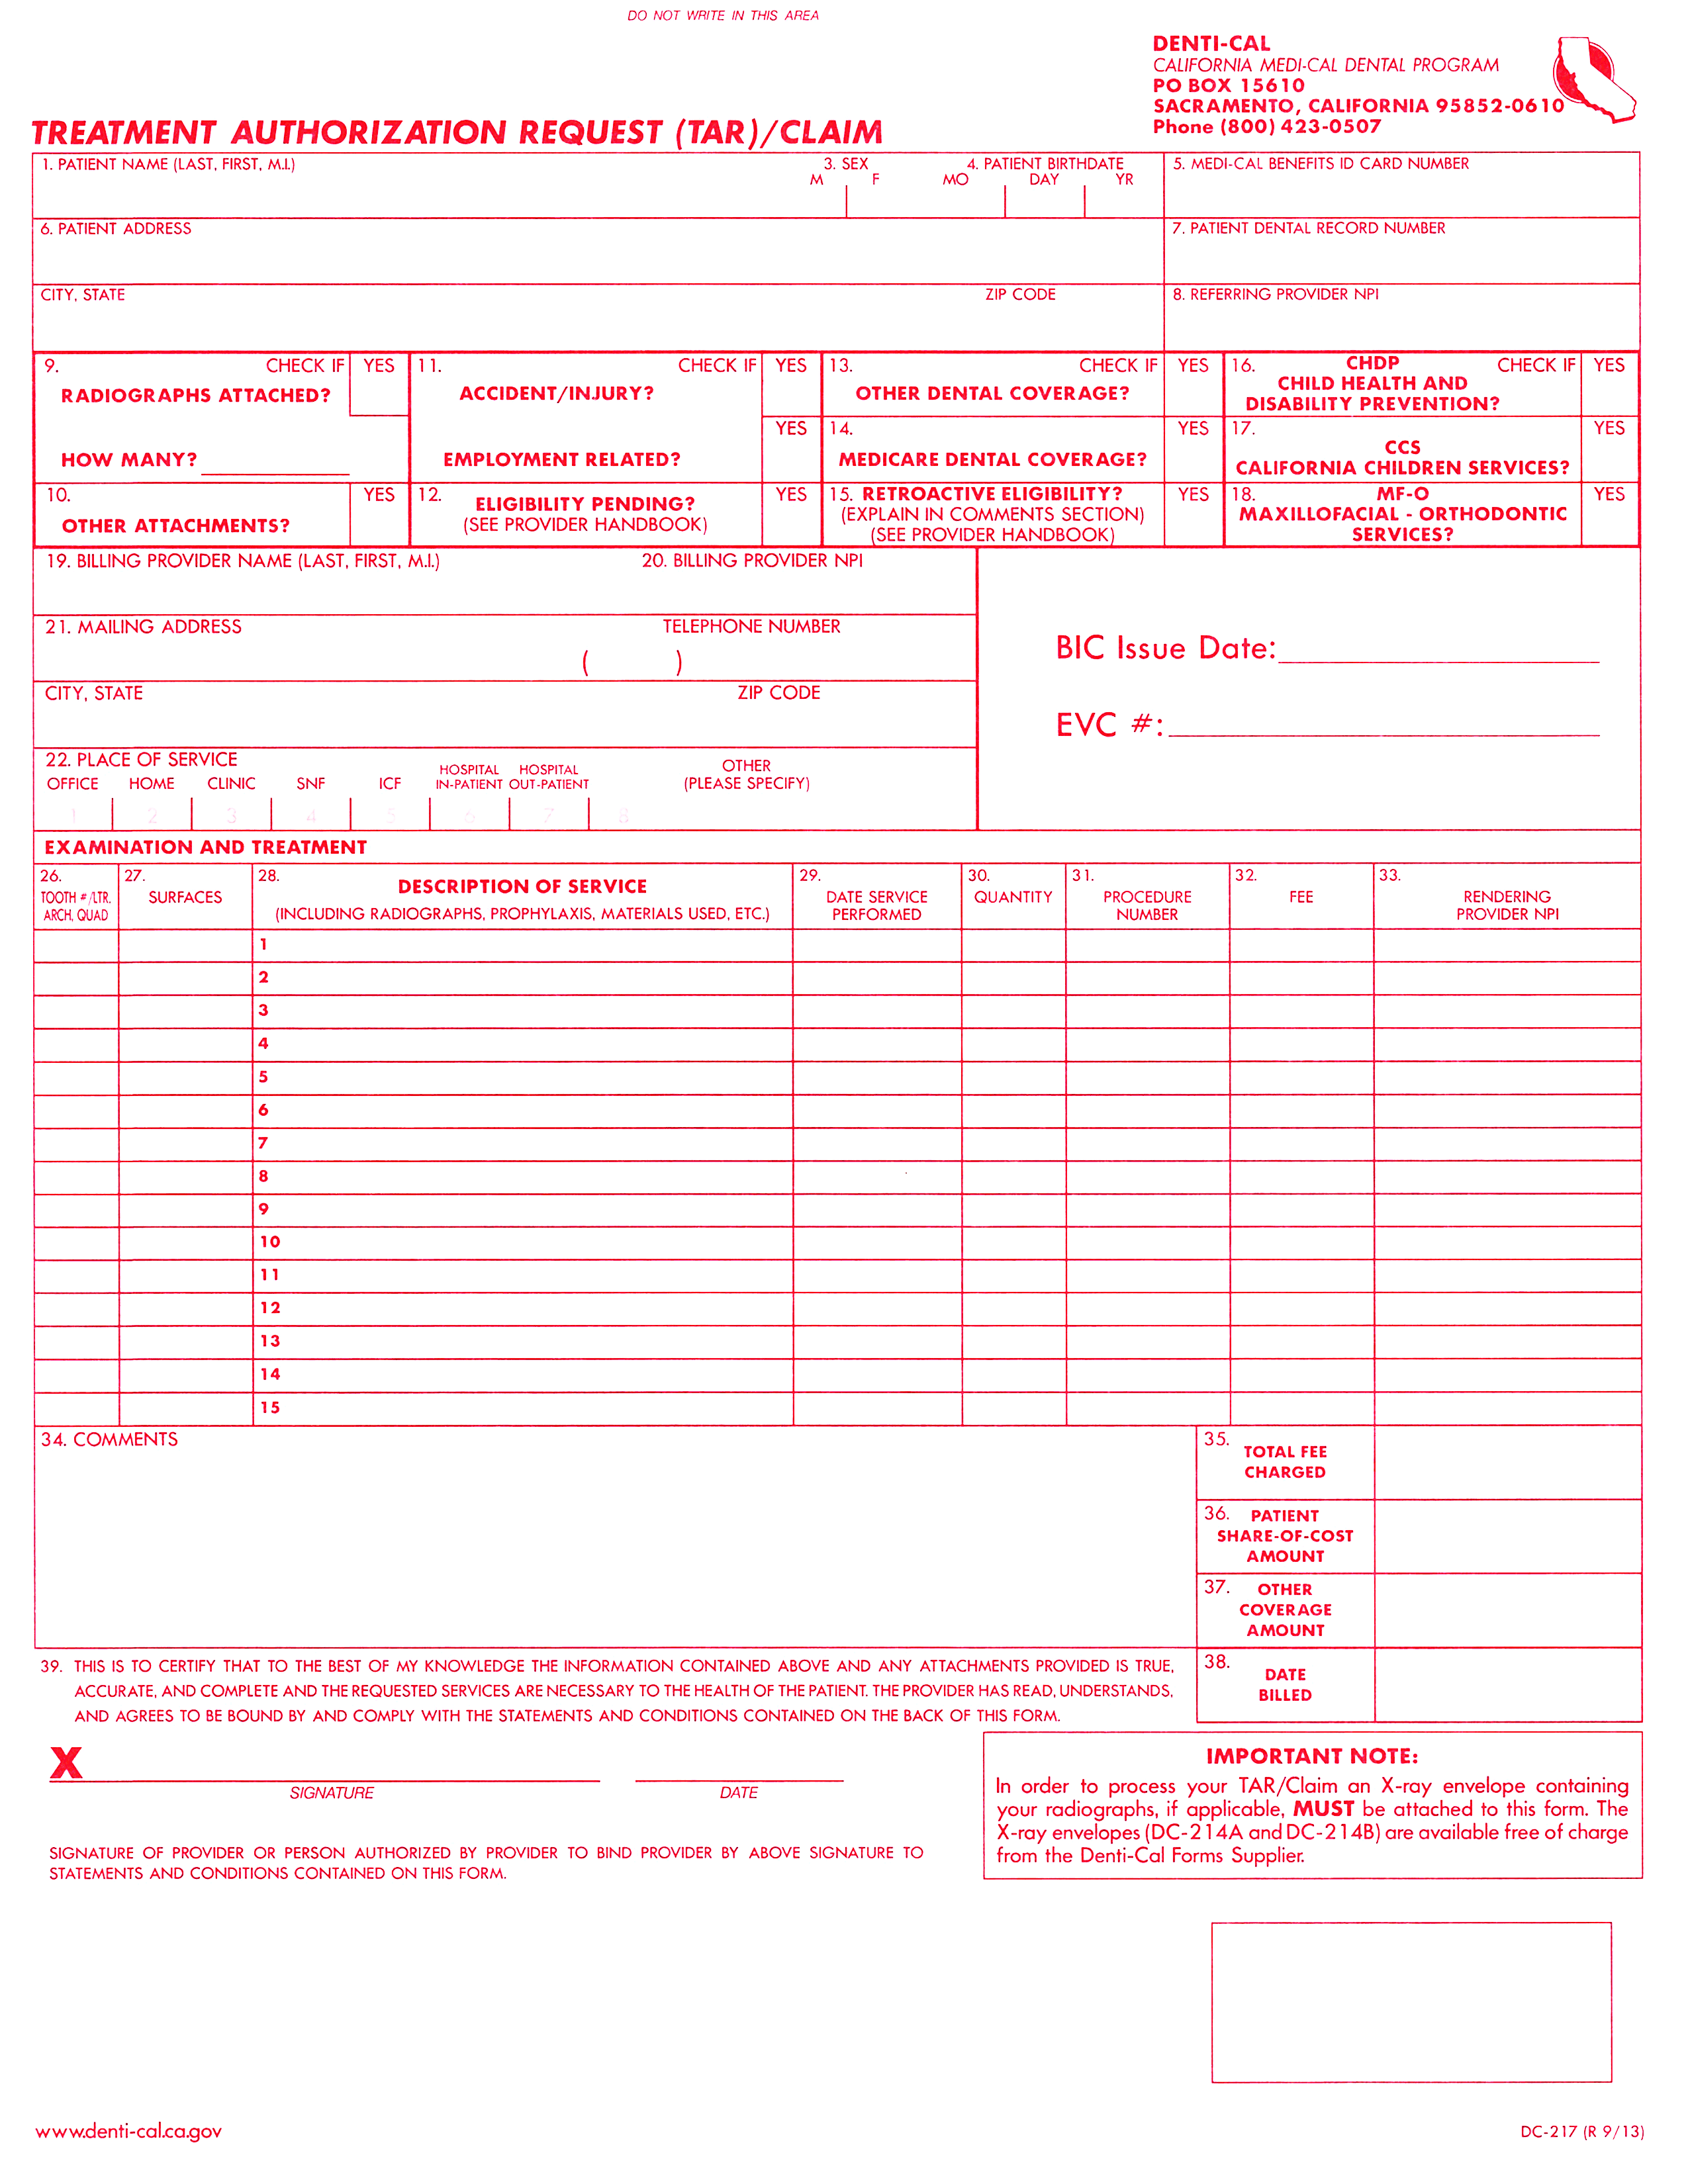
If printing forms, here are the downloads for the 2008 Denti-Cal claimform:
- DC-217.gif - background image for all versions.
- Dentical-DC-217.xml - use for versions 12.3.2 and earlier.
- Dentical-DC-217_v12_3_3.xml - use for versions 12.3.3 and greater.
- Dentical-DC-217_v17.2.1.xml - use for versions 17.2.1 and greater.
For detailed steps on importing these files into Open Dental, see Claim Forms.
- Occasionally (like in June-October of 2019) Denti-Cal requires communication testing when they make changes to their system.
- This generally does not involve Open Dental. You should contact Denti-Cal to schedule testing.
- If any bugs are discovered when testing, then please contact Open Dental.
Submitting Claims
Larger offices may want to submit directly to Denti-Cal, because there is a fee per claim when using a clearinghouse. The Open Dental X12 file format is certified by Denti-Cal, however each dental office that wishes to submit directly must also go through their own certification testing with Denti-Cal. During the testing phase, you can still use your existing clearinghouse (e.g. ClaimConnect) to submit claims.
The general test certification steps are as follows:
- Fill out the Provider Service Office Electronic Data Interchange (OSF) form, EDI Enrollment Application, and Electronic Remittance Advice (ERA) form and submit to Denti-Cal.
- Conduct a preliminary test with Denti-Cal. Submit one 837D claim transaction to Denti-Cal. Once successful, Denti-Cal's EDI Support requests a formal project from the State. After obtaining approval from the State, Denti-Cal provides Tumbleweed instructions (a secure email).
- Denti-Cal issues a Login ID (Remote ID) and password when a provider enters the full testing phase (step 4). Use this information to set up the Denti-Cal clearinghouse.
- Complete the full testing phase by submitting test cases for certification.
- Wait for test verification.
1: Fill out the Provider Service Office Electronic Data Interchange OSF
Providers currently enrolled to submit electronically must update EDI enrollment to that of a direct submitter by completing the Provider Service Office Electronic Data Interchange Option Selection Form (OSF). There is also an additional ERA Enrollment Form to address the 835 transaction. These forms can be found on the Denti-Cal website.
On the OSF, there is a section named EDI INPUT/OUTPUT OPTIONS. It should be filled out as follows. 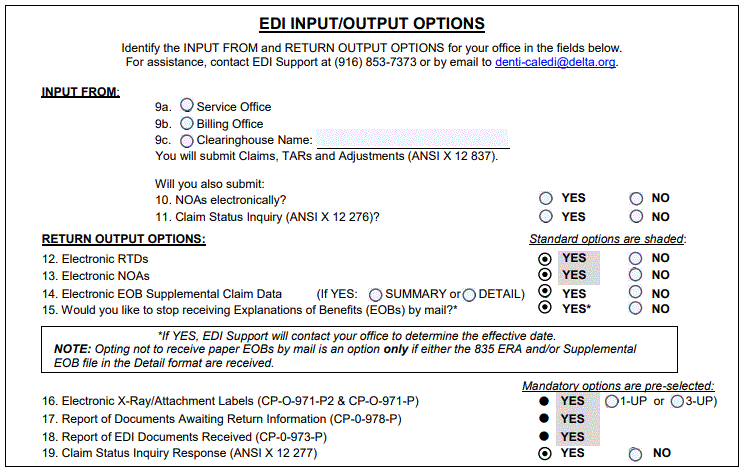
Submit the form to Denti-Cal.
2: Conduct a Preliminary Test with Denti-Cal
Denti-Cal will request that one 837D claim transaction be submitted via Tumbleweed (a secure email).
- In the Main Menu, click Setup, Family/Insurance, Clearinghouse, then double-click on Denti-Cal. Temporarily change the Comm Bridge setting to none.
- Create the claim in Open Dental.
- Click Send to send the claim file to the Claim Export Path set on the Edit Clearinghouse window (typically C:\Denti-Cal\).
- Send the file to Denti-Cal as requested.
Once this test is successful, Denti-Cal requests a formal project from the State.
- If Denti-Cal is your primary clearinghouse, set Denti-Cal as the default in the E-Claims window.
- If Denti-Cal is not your primary clearinghouse, enter each Insurance Plan's Payor ID in the Edit Clearinghouse window.
3: Set up the Denti-Cal Clearinghouse
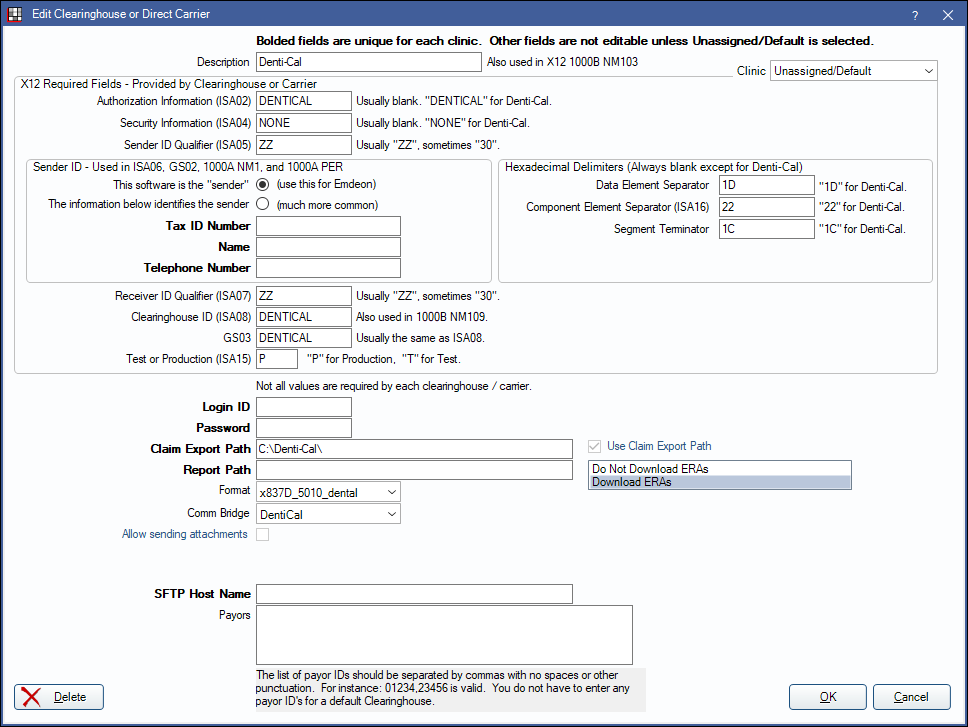
Once a provider enters the full testing phase (step 4), Denti-Cal issues a Login ID (Remote ID) and password. Use this information to set up the Denti-Cal clearinghouse. The Remote ID starts with the letters DC. Any other letters in the Remote ID must be capitalized when entered into the clearinghouse setup window.
In the Main Menu, click Setup, Family/Insurance, Clearinghouse, then double-click on Denti-Cal. Enter the information below, using the Remote ID and password supplied by Denti-Cal. Make sure to change the Comm Bridge back to Denti-Cal.
4: Submit Test Cases for Certification
For test cases, use data from real patients and real insurance plans to make testing easier. The claims used for testing should be fake claims, because they are not adjudicated.
Manually enter two test patients into a blank Open Dental database as follows:
- Patient 1: One Denti-Cal insurance plan with real subscriber name and subscriber ID. No other insurance plans.
- Patient 2: Two insurance plans. The primary insurance plan must be a non Denti-Cal plan with fake subscriber name and fake subscriber ID of 123456789. The secondary plan must be a Denti-Cal plan with a real subscriber name and a real subscriber ID.
Create the following fake procedures and claims for certification testing. Once all claims are created, all test cases can be sent in a single test batch.
The following test cases were updated on 09/08/2015:
- Representation of all document types as applicable:
- Select patient 1
- Claim
- Create and complete one procedure: a D2161 with fee 230.
- Create a claim for the D2161.
- In the Edit Claim window, under the General tab, type the following Claim Note: "Claim test"
- TAR (Preauthorization)
- Create a treatment planned procedure: a D0150 with fee 20.
- In the Treatment Plan module, select the D0150 and click the Preauthorization button to create a new Preauthorization claim.
- In the Edit Claim window, under the General tab, type the following Claim Note: "TAR test"
- NOA for Payment
- Create and complete one procedure: a D2950 with fee 210.
- Create a claim for the D2950.
- In the Edit Claim window, under the Misc tab, set the Prior Authorization (rare) to ABCDEFGH.
- In the Edit Claim window, under the General tab, type the following Claim Note: "NOA test"
- Claim Adjustment (Correction)
- Create and complete one procedure: a D1110 with fee 40.
- Create a claim for the D1110.
- In the Edit Claim window, under the Misc tab, set the Correction Type to Replacement and the Original Reference Num to "123456789".
- In the Edit Claim window, under the General tab, type the following Claim Note: "Claim Adjustment test".
- Claim with x-rays and attachments.
- Select patient 1.
- Create and complete one procedure: a D6750 with fee 500 (Prosthesis Replacement set to initial).
- Create a claim for the D6750.
- In the Edit Claim window, under the Attachments tab, type "1" in the Radiographs textbox.
- In the Edit Claim window, under the Attachments tab, set the Attachment ID Number to "NEA#1234567".
- In the Edit Claim window, under the General tab, type the following Claim Note: "x-ray and other attachment test"
- Claim with multiple dates of service.
- Select patient 1.
- Create and complete one procedure: a D0120 with fee 60.
- Create and complete one procedure: a D1351 with fee 130.
- Set the date for the D0120 to today's date, and set the date for the D1351 to yesterday's date.
- Create a single claim with both procedures attached.
- In the Edit Claim window, under the General tab, type the following Claim Note: "Multiple dates of service test"
- Claim with multiple rendering providers.
- Click Setup, Preferences. Check On e-claims, send treating provider info for each separate procedure.
- Select patient 1.
- Create and complete one procedure: a D0140 with fee 57.
- Create and complete one procedure: a D0272 with fee 130.
- Change the treating provider on the D0140 so it is different than the treating provider for the D0272 (based on NPI).
- Create a single claim with both procedures attached.
- In the Edit Claim window, under the General tab, type the following Claim Note: "Multiple rendering providers test"
- At least one transaction that includes a service description.
- Select patient 1.
- Create and complete one procedure: a D0330 with fee 88.
- Edit the D0330. In the bottom left of the Procedure Info window, type "test note" into the E-claim Note.
- Create a claim for the D0330.
- In the Edit Claim window, under the General tab, type the following Claim Note: "Service description test"
- At least one transaction that includes a Share of Cost amount.
- Select patient 1.
- Create and complete one procedure: a D0270 with fee 100.
- Create a claim for the D0270.
- In the Edit Claim window, under the General tab, type the following Claim Note: "Share of Cost test"
- At least one transaction that includes an Other Health Coverage amount.
- Select patient 2.
- Create and complete one procedure: a D1120 with fee 58.
- Create a primary claim for the D1120.
- Edit the claim and click the By Procedure button.
- Enter an insurance payment amount of 18.
- Create a secondary claim for the D1120. This is the claim which Denti-Cal sees. The share of cost in this example is 18.
- In the Edit Claim window, under the General tab, type the following Claim Note: "Other Health Coverage test"
- Only send the secondary Denti-Cal claim for testing purposes. The primary claim should not be sent.
- At least one transaction reflecting a non-employment related accident.
- Select patient 1.
- Create and complete one procedure: a D2140 with fee 135.
- Create a claim for the D2140.
- Edit the claim. In the General tab at the bottom, change the Accident Related dropdown to Other, set the Accident Date to today's date, set the Accident State to your state.
- In the Edit Claim window, under the General tab, type the following Claim Note: "Non employment-related accident test"
- At least one transaction reflecting an employment-related accident.
- Select patient 1.
- Create and complete one procedure: a D2150 with fee 165.
- Create a claim for the D2150.
- Edit the claim. In the General tab at the bottom, change the Accident Related dropdown to Employment, set the Accident Date to today's date, set the Accident State to your state.
- In the Edit Claim window, under the General tab, type the following Claim Note: "Employment-related accident test"
- One or more transactions that include:
- Select patient 1.
- Tooth code(s)
- Create and complete one procedure: a D2940 with fee 90.
- Create a claim for the D2940.
- In the Edit Claim window, under the General tab, type the following Claim Note: "Tooth code test"
- Arch code(s)
- Create and complete one procedure: a D5110 with fee 1130 (Prosthesis Replacement set to initial).
- Create a claim for the D5110.
- In the Edit Claim window, under the General tab, type the following Claim Note: "Arch code test"
- Quadrant code(s)
- Create and complete one procedure: a D4341 with fee 220...
- Create a claim for the D4341.
- In the Edit Claim window, under the General tab, type the following Claim Note: "Quadrant code test"
- Surface code(s)
- Create and complete one procedure: a D2160 with fee 210.
- Create a claim for the D2160.
- In the Edit Claim window, under the General tab, type the following Claim Note: "Surface code test"
- According to Denti-Cal: "When a single NPI is registered with Denti-Cal for more than one service office, the NPI is considered non-subparted. If transactions for non-subparted NPIs will potentially be submitted, submit transactions for multiple service offices. Service office locations are identified using qualifier 'LU' in REF01 of Loop 2010BB." Open Dental does not currently handle sub-parted NPIs for Denti-Cal. If this feature is needed, please contact us.
- According to Denti-Cal: "If services will potentially be rendered to recipients residing in SNF or ICF facilities, submit Service Facility information in Loop 2310C." To send the service facility information (site place of service, address and NPI), follow these steps.
- Create a provider that is 'not a person' and for NPI enter the service facility's NPI.
- Create a site (Site List) for the service facility and enter the following:
- Assign the provider as the default Provider.
- Set the default place of service to something other than office.
- Enter the site's address.
- For at least one procedure assign the site (Procedure - Misc Tab).
- Create a claim for the procedure and send it.
Note: For 5010 dental e-claims, the place of service on the claim cannot be 'office' and the site provider cannot be the same as the billing provider.
Notify Denti-Cal's EDI Support (denti-caledi@delta.org) that you intend to submit a batch of test claims. To send the test batch, in the Manage module, clickSend Claims. Click the Send E-Claims dropdown, then select Denti-Cal.
5: Wait for Test Verification
Following review, EDI Support will advise if there is anything wrong with the batch or if additional test claims are needed. EDI Support will notify users when the batch meets their test requirements and when cleared for live claims in the production environment.
Preauthorization DCN
Denti-Cal assigns a Document Control Number or "DCN" to the original preauthorization or "TAR" submitted. When the claim associated with a TAR is submitted, Denti-Cal requires that the DCN be in included on it (sent in 2300 loop, REF G1 segment). This is entered in the Edit Claim window, Misc tab, under "Prior Authorization (rare)." You can find the DCN on the approval notice or "NOA" that was sent by Denti-Cal.