

Draw on Tooth Chart
Use the Draw tab to manually add indicators on the Graphical Tooth Chart.
In the Chart Module, click the Draw tab.
Freehand draw on the Graphical Tooth Chart using a mouse or touch screen. This is useful to indicate items that do not already have a graphic (e.g., cracked teeth, abscesses, supernumerary teeth, lingual archwires, etc.)
Drawing on the Chart
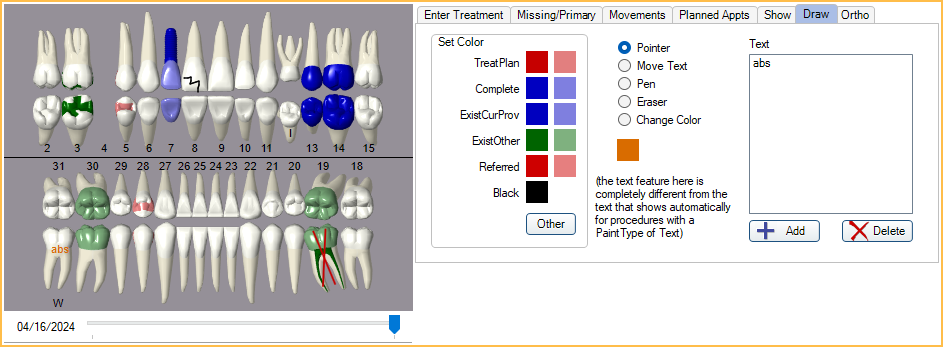
Use the following features to draw on and customize the tooth chart.
Set Color: Select the color to use when drawing or typing. Colors match what is set in Definitions: Chart Graphic Colors. Alternatively, click Other to select a custom color. The selected color is displayed on the right.
Options:
- Pointer: Use to select teeth when charting procedures. After drawing on a tooth chart, always have Pointer selected before moving on.
- Move Text: Use to move custom text around on the tooth chart. Only available with DirectX 11.
- Pen: Use to draw on the tooth chart.
- Eraser: Use to erase drawings.
- Change Color: Use to change the color of an existing drawing or text. Select the new color, then select Change Color, and click on the drawing or text within the tooth chart.
Text: Add or delete custom text to the tooth chart.
- Add: Click to add Text. New text is added to the top-left. Use Move Text to click and drag the text to its desired location.
- Delete: Highlight text from the box above, then click to delete.
- Custom text added here is distinct from text added by Procedure Codes with a Paint Type of Text.
- DirectX 11 Graphics must be enabled for text to display on the tooth chart.
- Custom text is not available for Open Dental Cloud users.