

Setup Wizard
Use the Setup Wizard tool to begin initial setup of the Open Dental database.
In the Main Menu, click Tools, Setup Wizard.
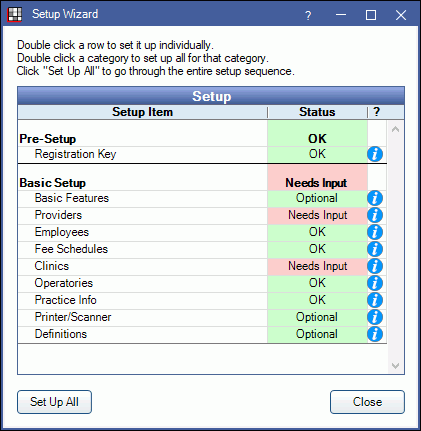
Green rows indicate areas where information has been entered. Red rows indicate areas that still require input. To read a brief explanation of a setup area, click the information icon (i).
Set Up All: Click to run through the entire setup wizard.
- To begin the setup of a specific category, double-click the category (Pre-Setup, Basic Setup, etc.)
- To set up a specific item, double-click the row.
Follow the instructions on each window to enter information, then click a button to proceed. ![]()
- Back: Return to the previous window.
- Next: Proceed to the next window.
- Skip: Leave the current setup area without entering information.
- Close: Exit the setup wizard.
A welcome window will preview each setup area. A completion window will indicate when the setup information has been entered.
Registration Key Setup
Enter the Open Dental registration key and run Procedure Code Tools.
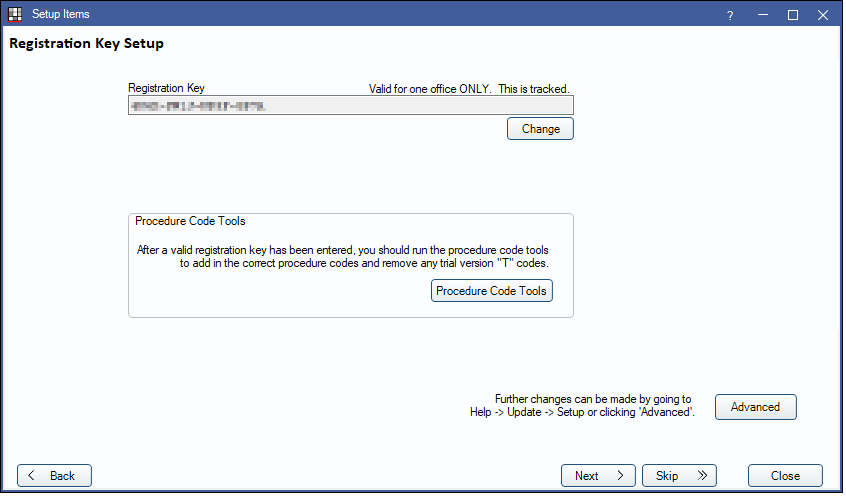
Registration Key: Click Change to open the Registration Key window. Review and agree to licenses, then enter the registration key and click OK to save.
Procedure Code Tools: This tool updates the procedure codes used in Open Dental. Click Procedure Code Tools to run the tool. See Procedure Code Tools for details.
Advanced: Click to access the Update Setup window.
Basic Feature Setup

Quickly turn on/off basic features the office may or may not use. Settings will affect all computers using the same database.
- To read a brief explanation of a feature, click the information icon.
- To turn a feature on, check the box. To turn a feature off, uncheck the box.
Advanced: Click to open Show Features.
Provider Setup
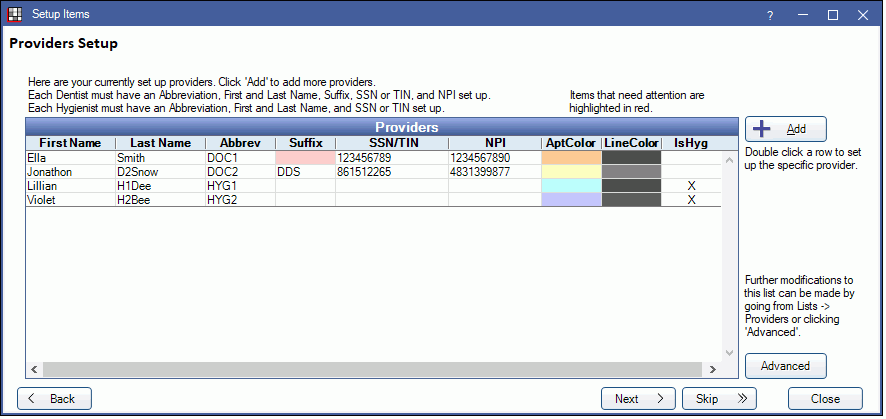
Enter information about providers. At a minimum enter abbreviation, first and last name, suffix, SSN or TIN (for dentists), and NPI.
- All current providers will list. Red cells indicate missing information.
- To add a provider, click Add. To edit provider information, double-click a row. See the Provider edit window for field definitions.
Advanced: Click to open Providers Setup.
Employee Setup
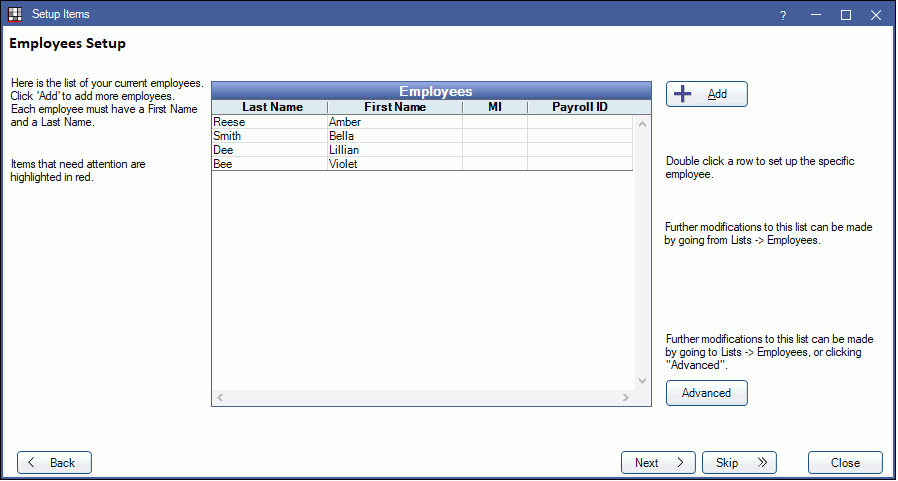
Enter employee information. This information is used to create user security profiles, set up employee work schedules, and provide access to the time clock.
- All current employees will list. Red cells indicate missing information. First and last name are required.
- Click Add to create a new employee. To edit an existing employee, double-click the row.
Advanced: Click to open Employees .
Fee Schedules
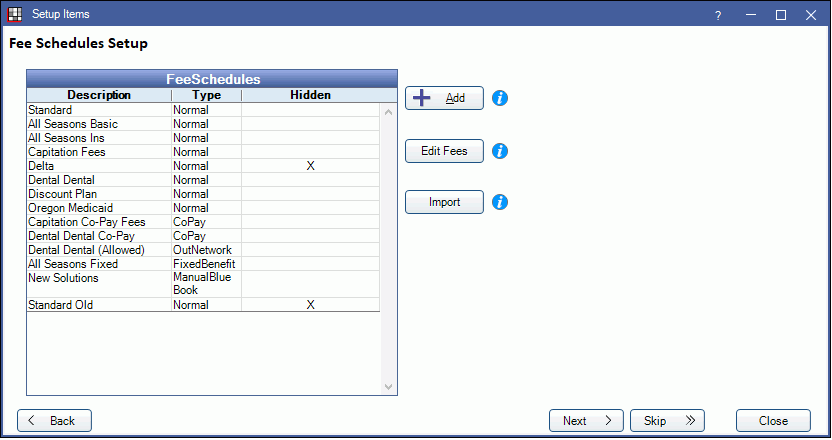
Enter office and insurance fee schedules. These will be assigned to a patient's insurance plan to accurately reflect treatment estimates.
- All current fee schedules will list.
- Click Add to create a new fee schedule.
- Click Edit Fees to bring up Procedure Codes to edit the associated fees.
- Click Import to import fees over the currently selected fee schedule. File must be in tab-delimited format (.xls, .txt, or .csv) with a column for procedure code and column for fees.
Clinics Setup
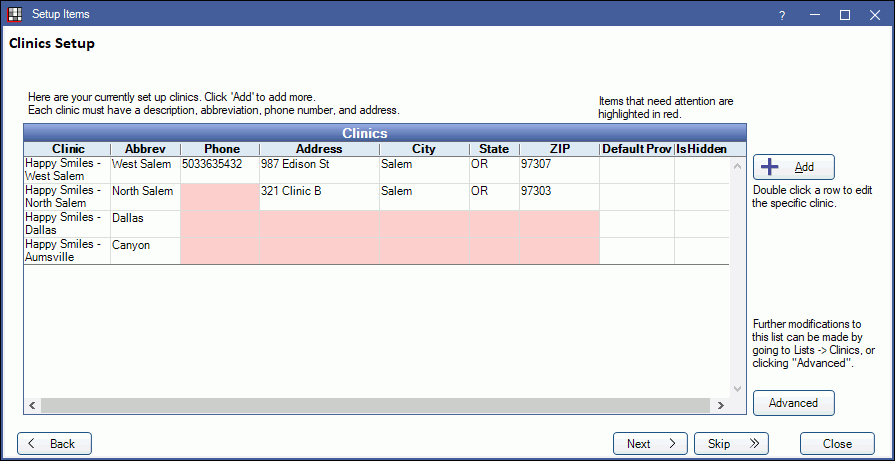
If Clinics is turned on in Basic Feature setup, enter basic information about each clinic.
- All current clinics will list. Red cells indicate missing information. Description, abbreviation, phone number, and address are required.
- Click Add to create a new clinic. To edit an existing clinic, double-click the row.
Advanced: Click to open the Clinic List.
Operatory Setup
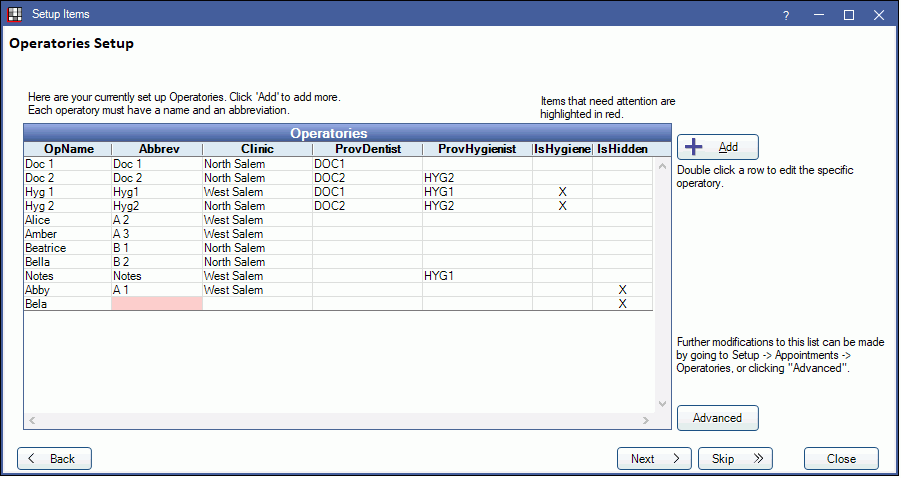
Name operatories that will show in the appointment schedule, assign default providers and clinics, and designate specific hygiene operatories.
- All operatories currently set up will list. Red cells indicate missing information. Name and abbreviation are required.
- Click Add to create a new operatory. To edit an existing operatory, double-click the row.
Advanced: Click to open Operatories.
Practice Info Setup
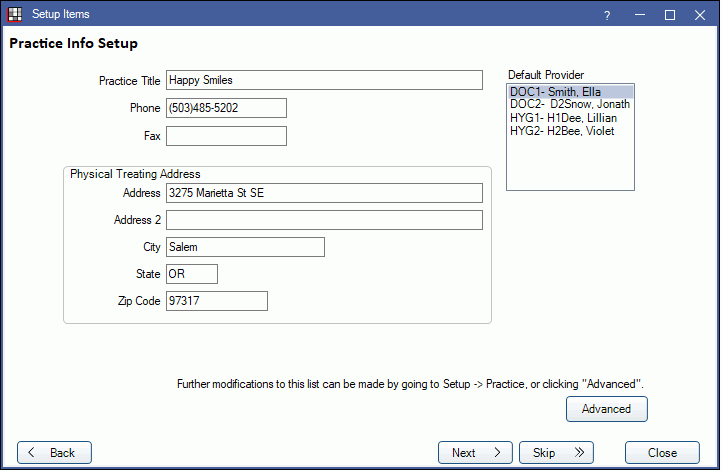
Enter general contact information, billing and pay-to addresses, and default providers for the practice. If Clinics is turned on, practice refers to headquarters.
- Practice Title: The name of the practice. If there is only one provider, the practice title can be the name of the provider.
- Phone / Fax
- Physical Treating Address: The physical location where treatment is performed. This address is always used on statements.
Advanced: Click to open Practice Setup.
Printer / Scanner Setup
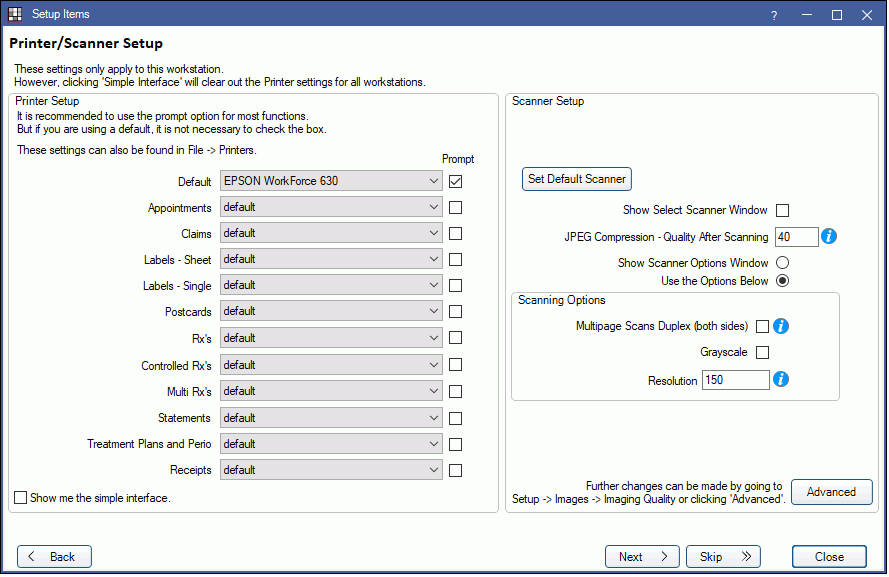
Set up print and scan options for the current workstation.
Printer Setup: All categories that allow a default printer are listed. See Printer Setup for more details about each option.
- For each category, click the dropdown to select the default printer.
- Prompt: Check the box to show a prompt window every time an item is printed. This allows users to verify printer and select other options prior to printing. When unchecked, items are printed directly.
- Show me the simple interface: To only set one default printer for all categories, check 'Show me the simple interface', then select the printer.
Scanner Setup: Set default options when scanning in the Images module. Click the information (i) icon for more details about an option.
- Show Select Scanner Window: Prompt user to select a scanner each time they scan.
- JPEG Compression - Quality After Scanning: Set the image quality (0 - 100) for the scanned file. A lower number means more compression and smaller file size.
- Show Scanner Options Window: Prompt the user to select scanning options each time they scan.
- Use the Options Below: Use the default scanning options set below each time a user scans.
- Multipage Scans Duplex: Checked: Scan both sides of documents. Unchecked: Scan one side of documents.
- Grayscale: Checked: Scan in grayscale. Unchecked: Scan in 24-bit color.
- Resolution: Enter the document resolution in dots per inch (50 - 1000).
- Advanced: Click to open Imaging Quality.
Definitions
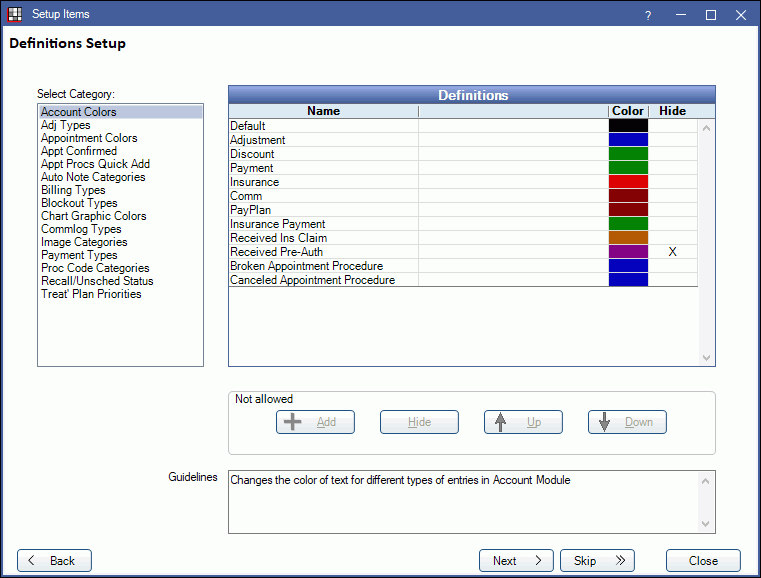
Enter list options and customize categories, colors, and defaults for various windows. See: Definitions for additional options.
- Add: Add a new item to a category.
- Hide: Hide an item. Select the item and click Hide. To unhide, double-click an item and uncheck Hidden in the Edit Definition window. Some items cannot be hidden or unhidden.
- Up/Down: Move an item up or down in the list. Select an item and click Up or Down. This will also affect the sort order of the item in pick lists.