

Dolphin Bridge
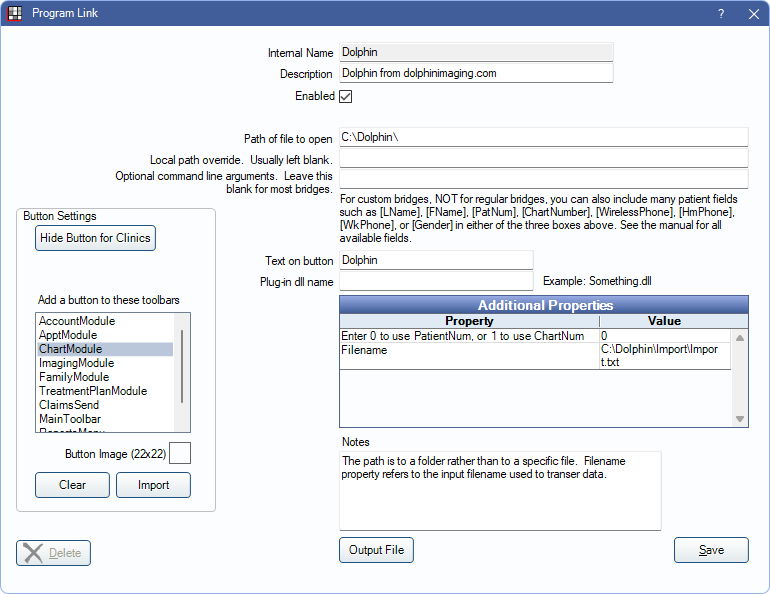
In the Main Menu, click Setup, Program Links. Double-click on Dolphin from dolphinimaging.com.
Dolphin is imaging software. Website: https://www.dolphinimaging.com/.
Bridge Setup
Enter the necessary settings to enable this bridge. Only the fields that need edits are listed:
- Enabled: Check to enable this bridge.
- Path of file to open: The location of the program executable. Defaults to C:\Dolphin\.
- Additional Properties: Double-click a row to change settings.
- Enter 0 to use PatientNum, or 1 to use ChartNum: Determine which identifier is used to launch the patient in the bridge.
- Filename: Verify the file path. By default this is C:\Dolphin\Import\Import.txt.
- Text on button: (Optional) Enter the text that is displayed for the bridge button.
- Button Settings: Determine the visual behavior of the bridge button.
- Hide Button for Clinics: If using clinics, determine which clinics this button should and should not display for.
- Add a button to these toolbars: Determine which toolbars this button should display under. Defaults to ChartModule.
- Button Image: (Optional) Import an image to show on the button (must be exactly 22 x 22 pixels).
Click Save to keep changes.
Technical Details
The bridge uses two programs:
- C:\Dolphin\dolDb.exe Passes information to Dolphin using the specified file. Text is written to a file, and then Dolphin imports it.
- C:\Dolphin\dolCtrl.exe Launches Dolphin using the specified patient id.
Everything is based on patient IDs. All changes to patient data are made from within Open Dental, and then kept automatically synchronized based on patient ID. The only time that synchronization is performed is when using the bridge to launch a patient in Dolphin. Open Dental never deletes patients from Dolphin.