

Dexis Integrator Bridge
In the Main Menu, click Setup, Program Links. Double-click on Dexis Integrator from www.kavo.com.
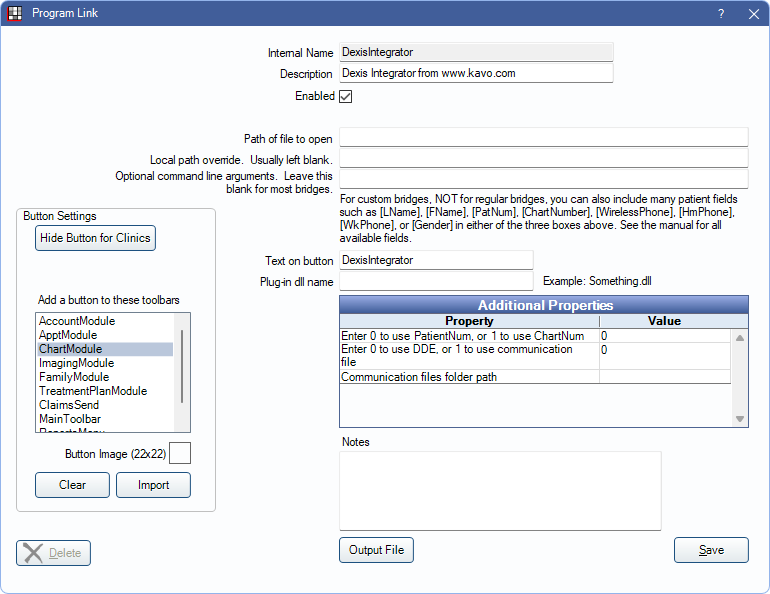
Dexis Integrator allows offices to bridge to the Dexis Integrator App. This allows offices to use RDP to connect with Dexis.
Website: https://dexis.com/en-us.
Bridge Setup
Enter the necessary settings to enable this bridge. Only the fields that need edits are listed:
- Enabled: Check to enable this bridge.
- Additional Properties: Double-click a row to change settings.
- Enter 0 to use PatientNum, or 1 to use ChartNum: Determine which identifier is used to launch the patient in the bridge.
- Enter 0 to use DDE, or 1 to use communication file: Determine how to transfer patient information to Dexis.
- Communication files folder path: If using a Communication File, enter the folder path where the files are stored.
- Button Settings: Determine the visual behavior of the bridge button.
- Hide Button for Clinics: If using clinics, determine which clinics this button should and should not display for.
- Add a button to these toolbars: Determine which toolbars this button should display under. Defaults to ChartModule.
- Button Image: (Optional) Import an image to show on the button (must be exactly 22 x 22 pixels).
Click Save to keep changes.
Additional Details
Offices may need to contact Dexis for additional required setup steps.
The selected patient information is sent to the Integrator software and the Integrator forwards that info to the local PC to launch Dexis locally with the selected patient. It causes the RDP session to be minimized and when the local Dexis is closed the RDP session is maximized again.