
BetterDiagnostics Process
BetterDiagnostics users can send images from the Open Dental Imaging Module to BetterDiagnostics for diagnosis.
In the Imaging Module, click BetterDiagnostics to send an image for analysis.
The BetterDiagnostics integration is designed for offices who use the Open Dental Imaging Module for all patient imaging. Visit their website for more details: betterdiagnostics.ai
Set Up BetterDiagnostics
To begin using BetterDiagnostics, first enable the feature:
- Sign up for BetterDiagnostics through the eServices Signup Portal.
- Enable the BetterDiagnostics Bridge bridge.
- Ensure the eConnector is installed and running.
Process an Image
- Take a new image in the Open Dental Imaging Module.
- While rare, images taken outside of Open Dental can be imported and sent to BetterDiagnostics as needed.
- Images added to the image categories listed in the BetterDiagnostics bridge are automatically sent for analysis.
- For images not sent automatically, select an image or mount, then click BetterDiagnostics.
- For images on mounts, rotations and sizing adjustments should be made prior to sending the image.
- All images on a mount are sent for analysis.
- Images may take time to process. Images update as they are processed. If an image takes longer than 10 minutes, the image times out and must be resent to BetterDiagnostics. Images that time out cause an alert.
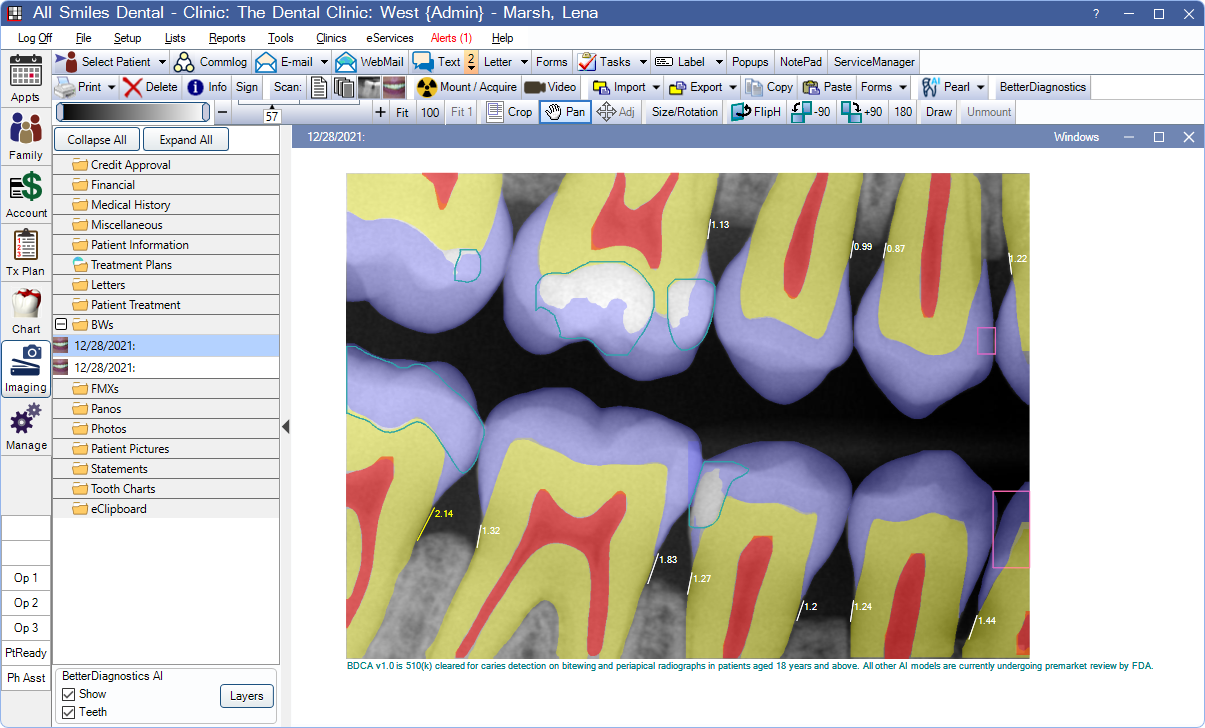
Viewing Layers
Images that have been processed by BetterDiagnostics offer viewing options in the lower left. These options remain selected until changed.
- Show: Check to display annotations. Uncheck to hide annotations.
- Tooth Parts: Check to show tooth parts. Uncheck to hide tooth parts.
Layers: Click to determine view settings for additional items. These options remain selected until changed.

- Tools: Click to show the option, Delete annotations for selected image. When selected, BetterDiagnostics details for the selected image are deleted.
- Show AI Annotations: Select whether to show or hide annotations.
- Findings: Toggle each box to hide or show the selected finding item.
- Color is populated when at least one x-ray in the database includes the finding.
- Bone Level is displayed using three different colors (white, yellow, and red) to indicate bone level range.
- Restorations: Toggle each box to hide or show the selected item. Hover over the area on an image to view the description.
- Teeth: Check to show tooth parts, or uncheck to hide tooth parts. Use the color key to help identify parts on the image.
Tips and Troubleshooting
If the initial results from BetterDiagnostics appear to be missing analysis, try adjusting the image contrast:
- In the Layers window, delete the annotations for the selected image.
- Adjust windowing values by using the Windowing slider in the Imaging Module toolbar.
- Click BetterDiagnostics to send the image again.