

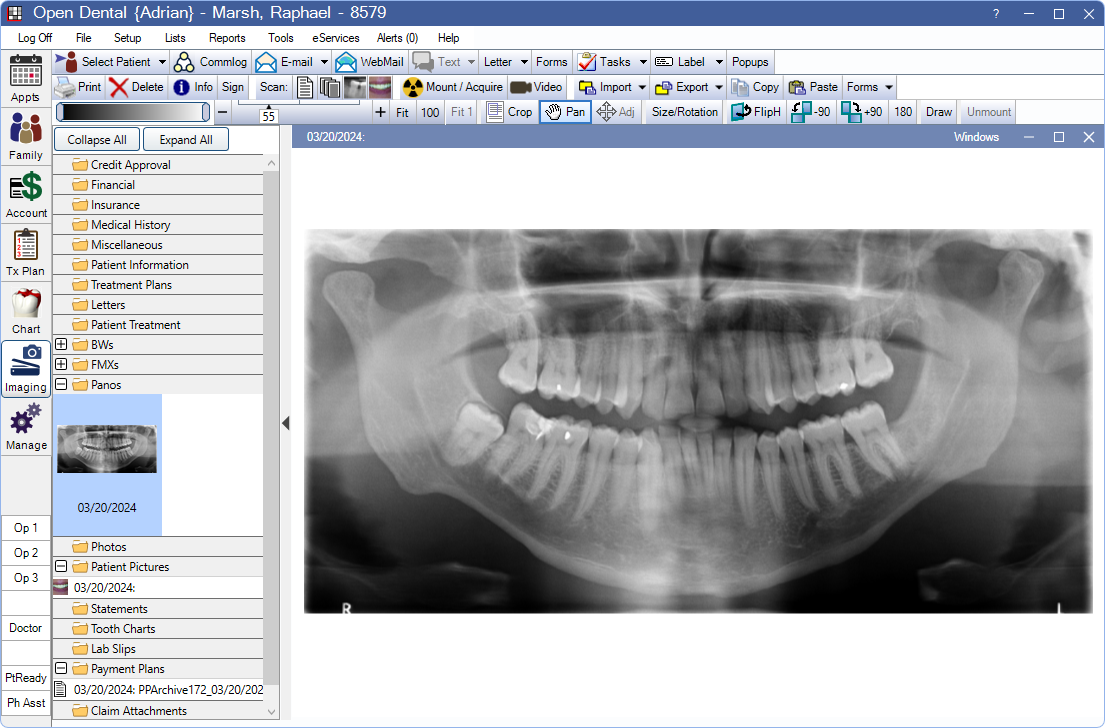
Imaging Module
The Imaging Module is a place to scan and store most images, radiographs, forms, and letters that are traditionally stored in a paper chart.
When scanning a single image or file, it is saved as a JPEG. Saving a multi-page document (from a document feeder) saves as a PDF. Additionally, other file types, including Word, PDF, and Excel formats can be imported into the Imaging Module.
External Software versus Open Dental
For many years, Open Dental focused on building Program Bridges to other imaging software. We have now added enough features that practices should not need any separate imaging software. Users can take radiographs directly in Open Dental. See Sensor Compatibility
Images Toolbar
Print: Prints to the Default printer in Printer Setup. The image is automatically resized to fit the printed page.
- Printing an image with a type of Radiograph includes a header with patient and mount information (if applicable).
- Not available for PDFs; to print a PDF, see the PDF dialogue instead.
Delete: Remove the selected file from Open Dental and delete it from the A to Z Folder (OpenDentImages).
Info: Open Item Info window to view or edit image or document information (e.g., category, name, date, etc.)
Sign: Open the Signature window to add or edit a notes on the selected image and electronically sign it. Electronic Signatures are supported. Once notes or a signature are saved, they are visible in the bottom-left of the image preview.
Scan Document: Scan a single-page document as a JPEG file using a connected flatbed scanner. Document is automatically selected as the file Type.
Scan Multi-Page Document: Scan a multi-page document as a PDF using a connected scanner with an automatic document feeder (ADF). Document is automatically selected as the file Type.
Scan Radiograph: Scan a radiograph using a connected flatbed scanner. The pixel windowing settings set in Imaging Setup are used as the default. Radiograph is automatically selected as the Type. Radiograph scans save as a JPEG file. Also see Enhancing Radiograph Images.
Scan Photo: Scan a photo as a JPEG using a connected flatbed scanner. Photo is automatically selected as the Type.
Mount / Acquire: Click to take images using an imaging device. See Select Mount and Acquire. To utilize imaging in Open Dental, first set up Imaging Devices and Mount Definitions.
Video: Click to open the Video Capture window. Use the live feed to take images and intraoral photos.
Import: Add an existing file from the current computer or network to Open Dental. Set a default path to open when clicking Import by entering the Default import folder in Preferences. When an image is imported, the Item Info window opens to enter notes and information.
- If an Image Category is selected, the imports go to the selected folder.
- If no Image Category is selected, and there is a Default Image Category set in Preferences, imports go to the default category.
- If no Image Category is selected, and there no default Image Category set in Preferences, imports go to the first folder in the Image Categories.
- Import Automatically: This could potentially be used by some phosphor plate systems. If they allow a folder to be designated where new images will be saved, then use the same folder as the default here. Set the Default folder for automatic import in Preferences. Click Start. As images are saved to the folder by the other software, they are automatically imported. Once scanning is complete, click Stop.

- Change: Click to select a folder for automatic import.
- Go To: Click to open the currently selected folder in the File Explorer.
- Start: Click to begin the automatic import.
- Stop: Click to end the automatic import.
- Close: Click to exit the automatic import interface.
Export: Export the selected file to another location on the computer or network. If an image is selected on a mount, only the selected image is exported. If the image is a TIFF file, it is exported as a JPEG. Other files are exported in their original file format.
-
Click the dropdown for additional options:
- Move to Patient: Move the currently selected image or document to a different patient. The Select Patient window opens, allowing users to select an existing patient or create a new patient to move the file to. Automatically switches to the newly selected or created patient, so the file can be moved to a different category (folder), as needed.
- Export TIFF: Export a selected TIFF file in TIFF format instead of JPEG.
Copy: Copy the selected image to the clipboard.
Paste: Paste files or bitmaps from the clipboard into the selected mount position or image folder.
Forms: Click the dropdown to quickly add frequently used PDF files or images (e.g., surveys, after care instructions, brochures) to the selected image category. Once added to a patient, click Sign to add notes or an electronic signature. To add forms to the dropdown, navigate to Forms in the OpenDentImages folder. Paste any documents or images into this folder. Restart Open Dental to view newly added templates.
The options below only work with image files, not PDFs or other documents.
- Windowing: Adjust windowing values by clicking and dragging either slider. If either slider is moved from the far end, single clicking in the Windowing area may move the slider. Windowing is useful for images like radiographs because it isolates gray levels. Changes are visible in the preview as adjustments are made. For more details, see Enhancing Radiograph Images.
- Zoom: Zoom by dragging, using the +/- buttons, typing in the box, or using the mouse scroll wheel.
- Fit: Click to fit the image to the screen.
- 100: Click to zoom to 100%, one image pixel per screen pixel.
- Fit 1: Only available for mounts. Click to fit the selected mount image to fit the screen.
- Crop: Click to activate, then click and drag to draw a rectangle around the part of the image to keep. Upon releasing the mouse, a confirmation appears. Click OK to remove the parts of the image outside of the drawn rectangle.
- This is for display only and does not alter the original image.
- Reset the crop from the Item Size window.
- Pan: Click to activate, then drag the image to reposition.
- Adjust: Only available for mounts. Once activated, drag to adjust an image slightly, or to move it to a different position in the mount.
- Size/Rotation: Click an image file or image within a mount to open Item Size or Item Size and Rotation on Mount. See Image Size for details.
- FlipH, -90, +90, 180: Use to flip and rotate the image.
- Reset the orientation from the Item Size window.
- This is for display only and does not alter the original image.
- Draw: See the Draw tool for details on drawing, adding text, adding lines, and adding measurements to an image.
- Unmount: Only available when viewing mounts. Select an image from the mount, then click to unmount it. Useful for moving images around. Once an image is unmounted, it appears in a section at the bottom.
- Remount: Use to remount an image. First, click the open spot on the mount, select the image, then click to remount it.
- Delete: Use to delete an image from a mount. First, unmount the image, select the image, then click to delete it.
- Retake: Select an image in the mount and click to unmount it. Use Mount and Acquire to replace the image.
- Close: Click to close the Unmounted section. Cannot be closed if images are left in the section.
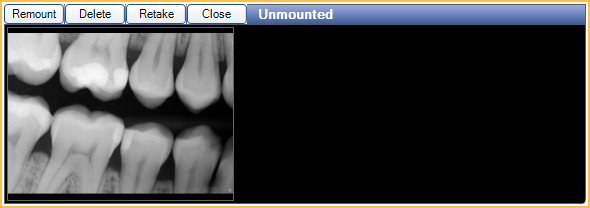
Image Categories
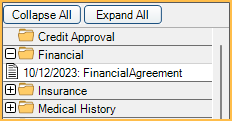
Files are organized in tree view by categories (folders). The documents within a folder/category are based on files stored in the patient's A to Z Folder. See Definitions: Image Categories to customize folders/categories.
Collapse All: Click to collapse all folders. Use the +/- symbols on a folder to expand and collapse as needed.
Expand All: Click to expand all folders. Use the +/- symbols on a folder to expand and collapse as needed.
Additional Details:
- A globe behind the folder icon indicates the folder is shared to Patient Portal. See Definitions, Image Categories, Show in Patient Portal.

- Right-click on a file or image to print, delete, open Image Info, or open Task Search to find any task the file is attached to.
- Right-click on a mount to print, delete, or open Mount Info.
- Single-click on an image file (JPEG, GIF, DICOM, etc.) or PDF, to preview it in the window on the right. For other file types, there is no preview capability.
- Drag and drop an image to move it from one category to another.
- Double-click a non-image (e.g., PDF, Text file) to open it in its default program. For example, a Word file (doc) would open in Microsoft Word.
- Images are sorted chronologically by the item Date and Time (hour/minute/seconds).
- If preference Sort images by date descending is enabled, the oldest item is first.
- If preference Sort images by date descending is disabled, the newest item is first.
- To change an item's sort order, edit the date and/or time in Image Info or Mount Info.
- Images stored in the categories designated as Show as Thumbnails and in Chart module display a thumbnail preview within the category.
Viewing Images
To view multiple images at once, select the first image, drag the image to the side using the title bar. This undocks the image and another image can be selected to display.
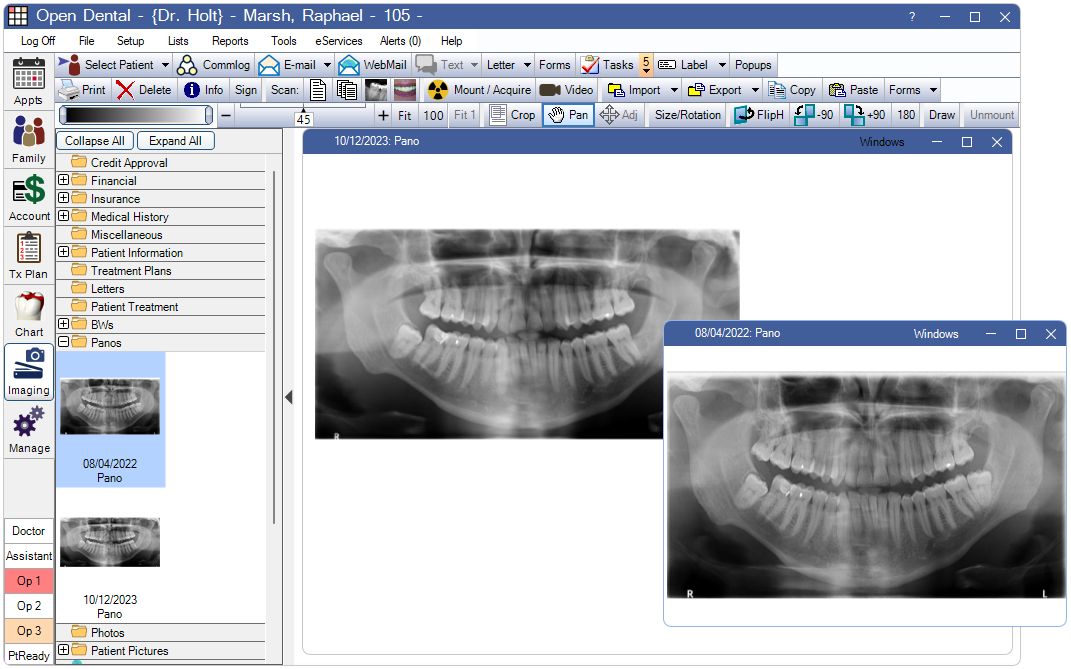
To move an image to a specific spot on the screen, click Windows in the image preview toolbar.
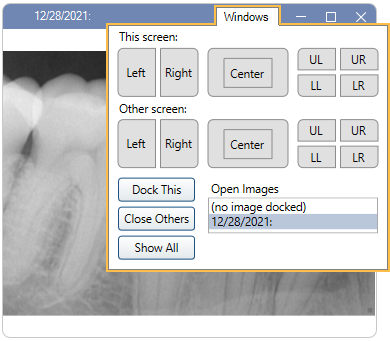
- This Screen: Click an option to move the image to that area of the current monitor/screen.
- Other Screen: Click an option to move the image to that area on another monitor/screen.
- Dock This: Dock the image to the Imaging Module.
- Close Others: Close any other open images.
- Show All: Open any minimized images.
- Open Images: Lists the file name for any open images.
Right-click options: Right-click options differ for PDFs, right-click an image preview to see the following options.
- Copy: Copy the image to the clipboard
- Paste: Paste a file from the clipboard to the Imaging Module.
- Flip Horizontally: Flip the selected image horizontally.
- Rotate Left: Rotate the selected image 90 degrees counter-clockwise.
- Rotate Right: Rotate the selected image 90 degrees clockwise.
- Rotate 180: Rotate the selected image 180 degrees clockwise.
- Delete: Remove the image from Open Dental and delete it from the A to Z Folder.
- Info: Open Item Info for the selected image.
Add Files into the Imaging Module
To add files into the Imaging Module, there are several options.
- Scan the documents or images
- Import files from another location on the computer or network
- Drag and drop files from a Windows folder directly into an Images folder: This does not work if Open Dental is running as an administrator.
- Copy/Paste an image from the clipboard: Within another program, copy the image to the clipboard (Ctrl + C or Edit, Copy). Or copy an active window to the clipboard by pressing Alt + PrtScn. In the Imaging Module, select the category and click Paste. Pasted images are not compressed, but generally use less space than a scanned document. Use the Print Screen Tool to export or print screenshots without saving to a particular patient.
- Pasting an image that already exists in Open Dental may cause a bloated file size, especially if it starts out as a gif. All such images get converted to jpg with zero compression, resulting in some bloat.
- The current recommendation for duplicating a gif is to copy it directly to the A to Z folders using Windows, then return to the Imaging Module and refresh. The new file is picked up and attached to the patient.
- Copy/Paste directly into the patient's folder: See A to Z Folder, Placing Images and Documents for detailed for instructions.
- The next time the Imaging Module is opened for the patient, the files are automatically added to the tree view and can be re-categorized and renamed.
- This is useful when copying large quantities of files at once.
- Once recognized by Open Dental, do not rename or move the files in the A to Z folder, or Open Dental will not know where to find them.
PDF Files
PDF files viewed in Open Dental use WebView2. If WebView2 is not installed, users are prompted to download the installation. This only needs to be done once on each workstation.
Double-click a PDF from the image category to launch it outside of Open Dental, using the workstation's default PDF viewer.
To always view PDFs outside of Open Dental, enable the preference, PDF files always launch in a separate window. Users will be required to double-click a PDF to view it.
Some toolbar options do not work with PDFs and are disabled when a PDF is selected. Use the options in the WebView2 interface instead.