

Ortho Chart Setup
The Ortho Chart can have customized tabs and fields to meet the needs of an office.
In the Ortho Chart, click Setup.
Alternatively:
- In Preferences, click Edit next to Ortho Chart Display Fields.
- In the Main Menu, click Setup, Display Fields, Ortho Chart.
If the total width of all Fields Showing in an Ortho Chart Tab exceeds 915, when printing from Ortho Chart, some fields may be cut off.
Setup Display Fields
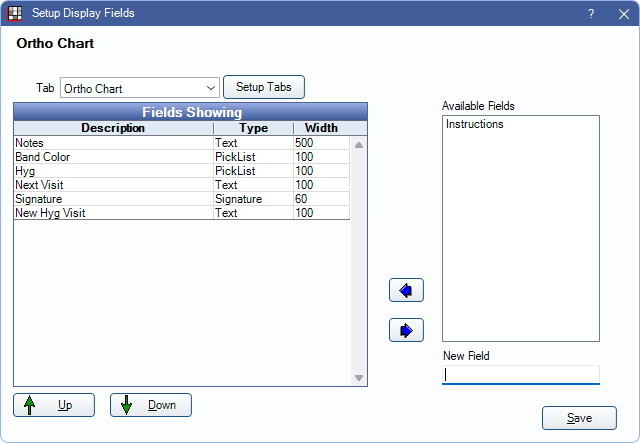
Ortho Chart Setup open in the Setup Display Fields window.
Tab: Choose the Ortho Chart tab to edit Display Fields. Click Setup Tabs to open Ortho Chart Tabs (see the following section).
Fields Showing: Lists the Display Fields currently visible for the selected tab. Highlight a field and use the Up / Down arrows to reorder the field in the list.
Available Fields: Lists the Display Fields that are not currently visible for the selected tab.
Left / Right: Highlight a field in the Available Fields list and click the Left arrow to move the field to the Fields Showing list. Highlight a field in Fields Showing and click the Right arrow to move the field to Available Fields.
New Field: Type a Display Field description and click the Left Arrow to create a new Display Field and add it to the currently selected tab.
A field is hidden when it is moved into Available Fields for every tab.
Ortho Chart Tabs
Tabs are a way to organize Ortho Chart information. By default, there is one tab labeled Ortho Chart, additional tabs can be added. Each tab can have the same or different columns showing.
- The name of the first tab determines the text on the Ortho Chart button in the Chart Module toolbar and the text of the Go to Ortho Chart right-click option when clicking on an appointment in the Appointments Module.
- When there are multiple tabs, the Ortho Chart button in the toolbar includes a dropdown for each tab.
Click Setup Tabs to make changes to the tabs displayed in the Ortho Chart.
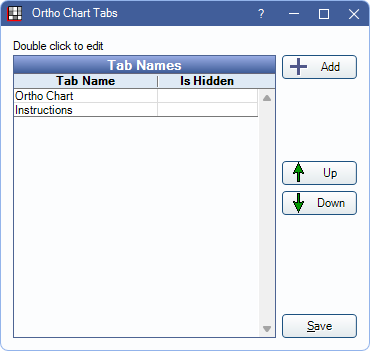
Click Add to create a new tab or double-click an existing tab name to edit. Ortho Chart Tab Edit opens.
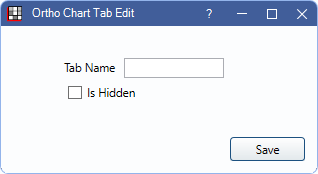
- Tab Name: Enter a description / title for the tab.
- Is Hidden: Check to hide this tab in the Ortho Chart.
- Click Save to keep changes.
Up / Down: Highlight a tab name and click to reorder in the list. The order affects how tabs are displayed in the Ortho Chart.
Click Save to keep changes
Edit Ortho Display Field
Click the Tab dropdown and select the tab where a field is showing. Double-click a field from the Fields Showing list to edit.
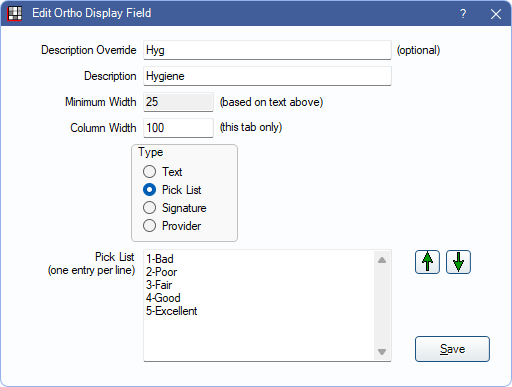
- Description Override: Enter text to display in the Ortho Chart instead of the Description. In Fields Showing, this is displayed in parentheses next to the Description. This is not displayed in Available Fields.
- Description: The name of the column. Changing the description of an existing field that contains data creates a new field with the new name which does not contain data. The original field is moved to Available Fields and retains the original data.
- Minimum Width: A fixed minimum column width based on the length of the Description.
- Column Width: Enter the actual width of the column. If the minimum width is more than the column width, adjust the column width to match for best visual results.
- Type: Determines how data can be entered into the field:
- Text: Allows typing into the field.
- Pick List: Allows only items from a list to be entered into the field. Enter list items in the Pick List box below. Enter one selection item per line. Use the Up / Down arrows to reorder items.
- Signature: Allows no direct input into the field. Adding a field of this type to any tab enables a Signature box in the Ortho Chart. If a row is signed, this field indicates if the signature is valid.
- Provider: Displays the provider associated with the row.
Click Save to keep changes.