Set Appointment Complete
When a patient is finished with their appointment, set the appointment complete to change the appointment color and complete the attached procedures.
In the Appointments Module, select the appointment. In the toolbar, click Complete

Alternatively:
- Right-click on the appointment. Select Set Complete.
- In the Chart Module Progress Notes, right-click the appointment. Click Set Complete.
- In the Edit Appointment window, change the status to Complete, then click OK.
Several Preferences affect behavior when setting an appointment complete.
- Allow setting future appointments complete
- Allow setting appointments without procedures complete
- Allow setting procedures complete
- Procedures Prompt for Auto Note
- Allow future dated transactions
When an appointment is set complete, the following changes occur:
- The appointment status changes to complete.
- The status of each attached Procedure is changed from treatment planned (TP) to complete (C).
- The provider for each procedure is assigned automatically based on the Appointment settings.
- Default Procedure Notes are copied into each procedure.
- The procedure date is set to today's date.
- For advanced users:
- Sets the SiteNum for each procedure to be the same as patient.SiteNum.
- Sets appointment InsPlan1 and InsPlan2 according to the current coverage.
- Syncs recall.
- If the appointment provider does not match the provider on at least one attached procedure, there is a prompt.
- Manually changing a procedure's status to complete on the Procedure Info window only changes the status. It does not change the procedure date or copy default procedure notes.
Appointment Texts
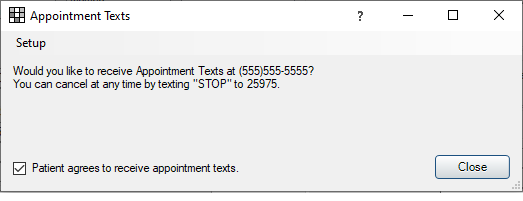
If Appointment Texts are enabled, and Opt in Prompt on Appt Complete is checked, a prompt appears when an appointment is set complete and the patient has not yet opted in or out of Appointment Texts. Staff must read the prompt to the patient and obtain verbal consent to allow Appointment Texts. 
If the patient does not consent to appointment texts, uncheck the box and click Close.

