

Update to Full Version
See Installation.
When you order the full version of Open Dental, a support technician will often update the software on the main computer and perform some minor required setup. If you update on your own, refer to the following instructions.
- If not already installed, install the Trial Version on the server.
- Update to the full version on the server following the instructions below.
- Perform required setup on the server (see below).
- If using Open Dental on several computers, see Install on Workstation. These steps are different than server installations.
These steps are used when updating from the Open Dental Trial Version to the Full Version. If the full version of Open Dental is already installed, use the steps on Install Update instead.
Update to the Full Version on the Server
The Trial version should already be installed.
- On the computer desktop, right-click on the Open Dental icon, then click Run as Administrator.
- In the Main Menu, click Help, Update, then Setup in the upper left corner.
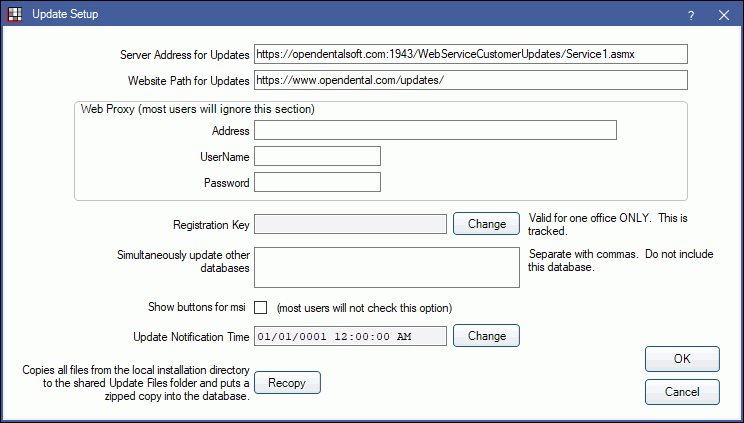
- Next to Registration Key, click Change.
- Enter the registration key from the welcome email.
- Review the CDT, Open Dental and SQL license agreements. Check the boxes to agree. See CDT Compliance.
- Click OK twice to return to the Update window.
- Click Check for Updates to see a list of all available versions.
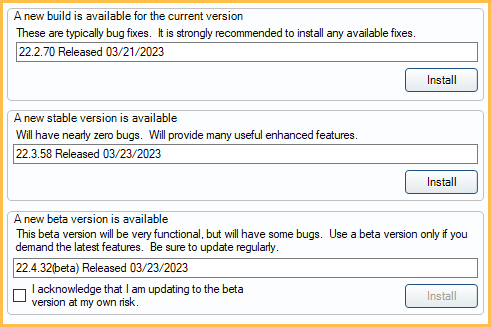
- Click Install next to the version to install. Only select one option. Normally, offices want to install the New Stable version. Do not install Beta unless users are comfortable with potential errors. Beta versions are not quite as stable and will require frequent updates.
- Any announcements specific to the update will show. Click OK to proceed.
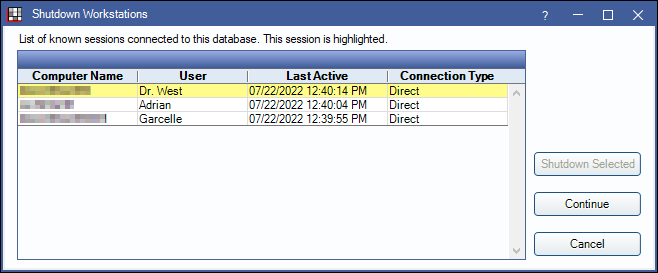
- Open Dental must close on all workstations. A warning message will show. Click Continue to close Open Dental on the listed workstations and start the download. The listed workstations will receive a warning before Open Dental closes.
- Restart Open Dental. When it opens, the new files will be copied to the server. Installation to the main computer is complete.
Required Setup
Complete these steps on the server (main computer) before proceeding. A support technician can assist the office.
- Run the Procedure Code Tools to remove temporary codes used in the Trial version and automatically add CDT codes.
- In the main menu, click Lists, Procedure Codes.
- At the lower left, click Tools.
- Check all boxes.
- Click Run Now.
- If using multiple computers, perform these on the server before installing on a workstation.
- See Share A to Z Folder.
- Set the path to the shared OpenDentImages folder. (In the main menu, click Setup, Data Paths).
If workstations have trouble connecting, it may be a firewall issue. If users cannot get past the Choose Database window, then it's a firewall issue. The office may need to create an exception to allow Port 3306. See Firewall for information on how to open Port 3306.